close

Lincoln Anderson

Food

The Home Oven Paradox: Translating Authentic Neapolitan Pizza Dough to 500 Degrees

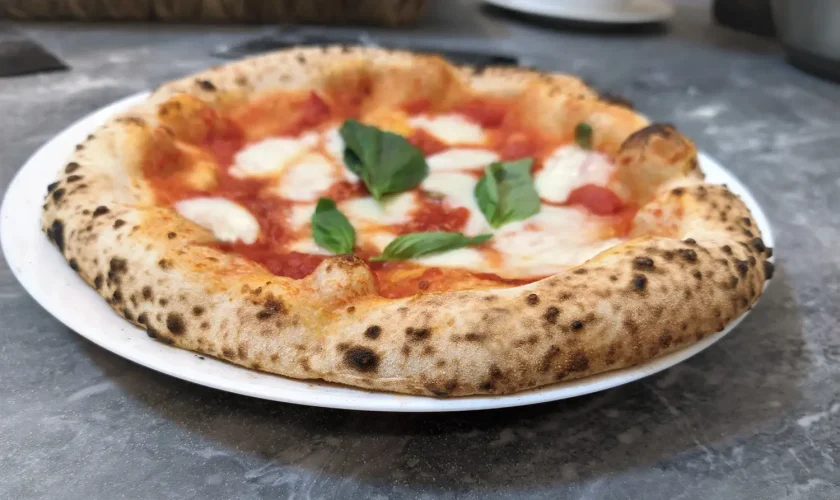
Walk into any venerated pizzeria along the Via dei Tribunali in Naples, and you will encounter a culinary dance governed by extreme physics. Inside a dome of hand-built refractory brick, hardwood burns down into an incandescent bed of embers. The internal air temperature hovers near 900 degrees Fahrenheit, while the floor stones radiate heat at roughly 800 degrees. An experienced pizzaiolo slides a dressed disc of dough onto the hearth, and within sixty to ninety seconds, magic happens. The outer rim balloons into a puffed, airy crown, scorched with leopard-spotted blisters, while the center remains tender, pliable, and moist.
Recreating that experience inside an American home kitchen presents an immediate, stubborn obstacle. The average residential oven tops out between 500 and 550 degrees Fahrenheit.
When home cooks attempt to bake a strict, traditional Neapolitan formula—consisting strictly of Italian Type 00 flour, water, sea salt, and yeast—in a 500-degree oven, the results are almost universally disappointing. Because the oven is hundreds of degrees colder than a wood-fired dome, the pizza requires six to eight minutes to bake rather than ninety seconds. Over that extended exposure to dry heat, moisture leaches out of the crumb. Instead of a cloud-like, bendable crust, you end up with a pale, dry, cracker-like disc that is tough to chew and lacks aromatic complexity.
Achieving authentic Neapolitan character at home does not mean abandoning tradition. It means understanding the science of thermal transfer and re-engineering the dough formula to compensate for the limitations of domestic heat. With strategic adjustments to hydration, fermentation, and thermal conductive surfaces, you can produce a pizza with an explosive, blistered cornicione and a tender interior right from a standard kitchen range.

The Physics of Thermal Transfer: Why the Rules Must Bend

The classic regulations governing true Neapolitan pizza were written for an environment with immense thermal energy. In a 900-degree oven, heat transfers through three simultaneous mechanisms: conduction from the volcanic floor stone, convection from rolling currents of hot air, and intense radiant heat bouncing off the low, curved ceiling. Water inside the dough flashes into steam instantaneously, stretching the gluten matrix before the proteins fully set.
In a conventional home oven, radiant heat is weak, and hot air circulates sluggishly. To bridge this energy deficit, the dough formula must be modified in three specific ways: higher hydration, the inclusion of fat, and the addition of complex sugars.

Elevating Hydration to Combat Moisture Loss

Traditional Neapolitan dough operates at roughly 58 to 62 percent hydration. In an ultra-hot oven, this relatively low water content works because the bake time is so brief that internal steam cannot fully escape.
In a domestic oven, where the pizza must bake three to four times longer, low hydration guarantees a desiccated crust. To keep the interior crumb tender while the exterior browns, raise the hydration level to 67 to 70 percent. This extra reservoir of liquid protects the gluten network from drying out, allowing the interior of the cornicione to remain custard-soft while the outer shell develops a crisp, delicate shatter.

The Heresy of Olive Oil

In Naples, adding oil to pizza dough is considered sacrilege. In a home kitchen, it is an absolute necessity.
Fat functions as a tenderizer and an insulator. A modest addition of high-quality extra virgin olive oil coats individual gluten strands, inhibiting excessive cross-linking and keeping the baked crust supple. Furthermore, fat slows the evaporation of water during an extended six-minute bake and encourages surface browning at temperatures where lean doughs remain stubbornly pale.

Encouraging Low-Temperature Browning

Wood-fired ovens create charred blisters through direct contact with blistering refractory clay and licking flames. At 500 degrees, the Maillard reaction moves slowly.
Incorporating a small percentage of diastatic malt powder or unrefined honey introduces simple sugars and active enzymes. These compounds accelerate caramelization, allowing the crust to develop rich, complex amber tones and deep savory flavor notes without having to stay in the oven so long that it turns into zwieback.

Flour Architecture: Selecting the Proper Grain Profile

Many home bakers assume that buying an authentic bag of imported Italian Tipo 00 flour will automatically solve their problems. In a home oven, standard Tipo 00 flour can actually work against you.
Tipo 00 refers exclusively to the grind of the flour, indicating that the wheat has been milled to an ultra-fine, powdery extraction with the bran and germ entirely removed. Most traditional Italian 00 flours are unmalted. They are designed for wood-fired ovens where temperatures exceed the scorch point of malted grains. When baked at 500 degrees, an unmalted 00 flour produces a crust that looks chalky and tastes underdeveloped.
For domestic baking, the ideal grain bill falls into two categories:
  • Malted Bread Flour: High-quality American unbleached bread flour typically contains between 12.5 and 13.5 percent protein and comes pre-malted with barley flour. The added enzymes break down complex starches into fermentable sugars, promoting vibrant browning and delivering the structural strength required to support high hydration.
  • The Hybrid Blend: For the quintessential balance of crispness and tenderness, blend 70 percent high-protein bread flour with 30 percent Italian Tipo 00 flour. The bread flour provides the structural backbone and browning capacity, while the 00 flour softens the chew and delivers that classic silky, extensible mouthfeel.

The Master Formula: 68-Percent Hydration Cold-Ferment Dough

This formulation is designed to yield four 260-gram dough balls, the optimal size for ten-to-eleven-inch pizzas on a standard domestic baking stone or steel.

Baker’s Percentages and Gram Weights

  • Bread Flour (or 70/30 blend): 600 grams (100%)
  • Water (lukewarm, roughly 75 degrees Fahrenheit): 408 grams (68%)
  • Fine Sea Salt: 17 grams (2.8%)
  • Extra Virgin Olive Oil: 15 grams (2.5%)
  • Diastatic Malt Powder (or mild honey): 6 grams (1.0%)
  • Instant Dry Yeast: 1.8 grams (0.3%)

Step-by-Step Mixing and Autolyse

Begin by whisking the flour and malt powder together in a large mixing bowl. In a separate vessel, dissolve the instant yeast into the water. Pour roughly ninety percent of the water mixture into the flour, reserving the rest.
Mix by hand or with a sturdy wooden spoon until no dry pockets remain. The mass will look shaggy and unrefined. Cover the bowl with a damp towel and let it sit undisturbed for thirty minutes. This brief pause, known as an autolyse, allows the flour starches to fully hydrate and initiates enzymatic activity without the tightening interference of salt.
After the resting period, dissolve the sea salt in the remaining water and pour it over the dough alongside the olive oil. Knead the dough inside the bowl, squeezing the mixture through your fingers until the slippery liquid is fully incorporated.
Transfer the dough to a clean work surface. Work it using the slap-and-fold method for five to seven minutes. Because the dough sits at 68 percent hydration, it will feel sticky at first; resist the urge to add raw flour. As the gluten network aligns, the surface will transition from textured and slack to smooth, supple, and elastic. Shape it into a tight boule, cover it inverted with the mixing bowl, and rest for twenty minutes.

The Fermentation Timeline

Perform two sets of stretch-and-folds spaced twenty minutes apart. To do this, reach under one side of the dough, pull it upward to extend the gluten without tearing it, and fold it over the center. Rotate the bowl ninety degrees and repeat three more times.
Place the smooth dough into an oiled container, seal it tightly with a lid, and let it ferment at room temperature for two hours to jumpstart yeast activity. Then, move the container directly into the refrigerator for 48 to 72 hours of cold fermentation.
During this extended cold retard, yeast activity slows to a crawl, but lactic acid bacteria and endogenous enzymes continue working. They dismantle complex starches into flavorful sugars and break down tough gluten proteins into pliable, extensible strands. This slow biochemical transformation produces the deep, slightly tangy flavor and airy crumb structure associated with world-class pizzerias.

Portioning and Final Proof

Four to five hours before you plan to bake, pull the cold dough from the refrigerator. Divide the bulk dough into four equal portions weighing approximately 260 grams each.
Shape each piece into a taut ball by cupping your hand around the dough and dragging it across an unfloured counter, using the natural friction of the surface to pull the outer skin tight. Place the balls into a lightly oiled dough proofing box or onto a rimmed baking sheet dusted with semolina flour. Cover them tightly with plastic wrap to prevent a dry skin from forming.
Allow the dough balls to come to room temperature and proof until they have roughly doubled in volume and rebound slowly when gently poked with a fingertip.

Preferments for Explosive Lift: The 100-Percent Poolish Option

If you want an even lighter crumb with voluminous air pockets, consider building your dough around a poolish—a wet, equal-parts flour and water preferment fermented with a trace amount of yeast.
To integrate a poolish, mix 200 grams of your total flour, 200 grams of water, a pinch of yeast, and five grams of honey sixteen hours before your main mix. Let it sit on the counter at room temperature. By morning, the preferment will be frothy, domed, and rippling with tiny bubbles.
Whisk the poolish directly into the remaining water and oil, then incorporate the rest of the flour and salt. The organic acids developed in the poolish weaken just enough of the gluten to create extraordinary extensibility. When this dough hits a hot surface, the trapped gases expand rapidly, yielding an ethereal, blistered cornicione that practically melts in the mouth.

Shaping Technique: Protecting the Internal Gas Matrix

How you open a dough ball determines whether your crust emerges light or dense. The cardinal rule of artisanal pizza shaping is simple: never use a rolling pin. A rolling pin crushes the delicate pockets of carbon dioxide that your yeast spent days creating, forcing all the gas out through the edges.
Dust your work surface with a fifty-fifty mix of all-purpose flour and coarsely ground durum semolina (semola rimacinata). Semolina acts like microscopic ball bearings beneath the dough, allowing it to glide effortlessly off the peel without sticking.
Place a proofed dough ball into the flour blend, coating both sides. Using the pads of your middle three fingers, press firmly into the dough, starting roughly one inch away from the top edge and working downward toward the bottom.
Do not touch the outer rim. Leave that one-inch perimeter completely uncompressed; this preserved border will become your cornicione. Flip the dough over and repeat the pressing motion on the reverse side, pushing air from the center into the edges.
Pick up the flattened round and drape it over the backs of your hands, keeping your knuckles positioned just inside the puffy rim. Gently rotate your hands in a circle, letting gravity pull and stretch the dough outward. The center should become translucent, while the border remains thick and airy. Transfer the shaped round directly to a lightly dusted wooden pizza peel.

The Heat Hack: Maximizing the Domestic Setup

To mimic the intense conductive heat of a wood-fired hearth, your equipment setup must maximize thermal density. Traditional cordierite pizza stones are adequate for bread, but they conduct heat too slowly for Neapolitan-style pizza.

The Baking Steel Advantage

Invest in a quarter-inch or three-eighths-inch thick baking steel. Steel features a volumetric heat capacity comparable to stone, but its thermal conductivity is roughly eighteen times higher. When a wet, high-hydration dough lands on preheated steel, energy transfers into the raw dough instantly, creating an explosive burst of bottom crust oven spring.

Positioning and the Broiler Technique

Set your baking steel on the second rack from the top of your oven, roughly six to eight inches below the upper broiler heating element.
Preheat the oven to its absolute maximum temperature—typically 500 or 550 degrees Fahrenheit—for a minimum of sixty minutes. The steel requires a full hour of thermal soaking to absorb and store maximum energy.
Ten minutes before you slide your first pizza into the oven, switch the oven from standard bake to the high broiler setting.
This preheats the steel even further while turning the top heating elements glowing red. When you launch the pizza onto the steel, the bottom crust is seared by intense conduction, while the top of the pie is blasted with direct radiant heat from the broiler element.
Keep the broiler on throughout the bake. Within two minutes, the top crust will bubble and blister. Rotate the pizza 180 degrees using a metal turning peel or tongs around the three-minute mark to ensure even coloring. In roughly four to five minutes, the pizza will emerge with charred blisters, melted cheese, and a crisp, pliable base.

The Path to Mastery

Making exceptional pizza at home is not a matter of luck or mystical secrets. It is a systematic practice of observing how ingredients respond to heat, time, and mechanical manipulation.
By increasing hydration to shield against dry heat, incorporating olive oil and malt to promote suppleness and browning, and pairing a long cold ferment with a scorching baking steel, you dismantle the limitations of the domestic oven. What comes out of your kitchen will not be a pale imitation of Naples—it will be an authentic, blistered triumph of modern food craft.
read more
Cooking TipsFeatured

The Maillard Reaction Explained: Science-Backed Searing Cooking Tips

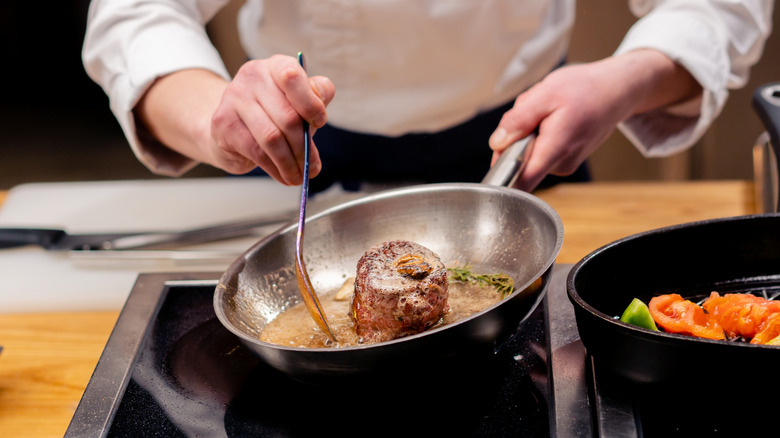
Drop a thick strip steak into a screaming-hot cast-iron skillet, and the reaction is immediate. The sizzle cracks through the kitchen, a plume of aromatic steam rises toward the hood, and within minutes, a pale, wet cut of raw muscle transforms into a mahogany-crusted centerpiece. That transformation is not merely cooking; it is chemistry at its most delicious.
For decades, home cooks were told that searing meat served a simple mechanical purpose: to “seal in the juices.” That persistent culinary myth, popularized in the nineteenth century by German chemist Justus von Liebig, has since been thoroughly dismantled by modern food science. Searing does not create an impermeable moisture barrier. In fact, high-heat cooking causes meat to lose more moisture than gentle, low-temperature methods.
We do not sear to lock in water. We sear to trigger the Maillard reaction, a complex cascade of chemical rearrangements that produces hundreds of entirely new flavor and aroma compounds. Understanding how this reaction works at a molecular level gives you absolute control over browning, allowing you to build deeper crusts, minimize overcooked gray bands, and produce restaurant-quality results on any heat source.

The Chemistry of the Crust: Amino Acids Meet Reducing Sugars

The Maillard reaction is named after the French physician and chemist Louis-Camille Maillard, who first documented the phenomenon in 1912 while studying how proteins synthesize. At its core, the reaction occurs when the amino acids in proteins collide with reducing sugars—such as glucose, fructose, or lactose—under the influence of heat.
Unlike caramelization, which is purely the thermal decomposition of carbohydrates occurring at high temperatures above 320 degrees Fahrenheit, the Maillard reaction requires both proteins and sugars. Once energy enters the system, these molecules bond to form unstable glycosylamines. These compounds promptly rearrange through what chemists call the Amadori rearrangement, setting off a dizzying chain reaction.
As the intermediate molecules fragment, recombine, and polymerize, they generate hundreds of volatile aromatic compounds. Pyrazines introduce savory, roasty, and nutty notes. Thiophenes and furans contribute meaty, earthy tones, while alkylpyridines supply rich, slightly bitter complexities.
The final phase produces melanoidins, large, complex nitrogenous polymers responsible for the deep amber and mahogany pigments that coat the exterior of a properly seared steak, a roasted coffee bean, or the crust of a sourdough boule.
While the Maillard reaction can technically occur at room temperature over months—it plays a quiet role in the long-term aging of serrano ham and vintage balsamic vinegar—it requires intense heat to take place within standard kitchen timeframes. The kinetic sweet spot sits roughly between 280 and 330 degrees Fahrenheit. Below 280 degrees, the reaction crawls at an imperceptible pace. Climb above 390 degrees, however, and you venture past the Maillard reaction into pyrolysis: thermal degradation that burns proteins, turns fats acrid, and creates bitter, carcinogenic char.

The Thermodynamic Enemy: Conquering Surface Moisture

If there is a single universal law in high-heat cooking, it is that water is the sworn enemy of the Maillard reaction.
Water boils and turns to steam at 212 degrees Fahrenheit at sea level. Because the phase change from liquid to gas requires a massive expenditure of thermal energy—known as the latent heat of vaporization—a pan containing liquid moisture cannot rise above 212 degrees until that moisture has completely evaporated.
If you drop a cold, wet steak into a hot pan, the heat does not go toward browning the meat. It goes toward boiling the microscopic film of surface water. The surface temperature stalls at 212 degrees, well below the 280-degree threshold needed for the Maillard reaction to ignite. The meat boils in its own juices, turning a dull, rubbery gray while the interior slowly overcooks.
Professional browning relies on deliberate moisture mitigation before the meat ever touches the cooking surface.

The Dry-Brining Protocol

Salting meat an hour before cooking draws moisture out through osmosis, leaving a wet puddle on the surface right when you want to put it in the pan. To harness the power of salt correctly, practice dry brining twelve to twenty-four hours in advance.
Coarse kosher salt draws cellular water to the surface, dissolves into a concentrated brine, and then gradually reabsorbs into the muscle fibers, seasoning the interior while denaturing proteins so they hold more liquid during cooking.

Uncovered Evaporation

Place your salted proteins on an elevated wire rack set over a rimmed baking sheet, and store them uncovered on the bottom shelf of your refrigerator for twelve to twenty-four hours.
The circulating, low-humidity air inside a modern refrigerator acts as a food dehydrator. Surface water evaporates, leaving the exterior bone-dry and forming a thin, glossy skin known as a pellicle. When this dehydrated surface meets hot cooking oil, heat transfers instantly to the proteins and sugars without wasting a single calorie of energy on boiling water away.

Harnessing Thermal Mass and Pan Material

Pan selection determines how much thermal energy is available to recover heat once cold food hits the metal. Light, non-stick aluminum pans excel at gentle heat distribution, but they possess negligible thermal mass. Drop a thick pork chop into a lightweight pan, and the surface temperature plunges, stalling your sear.
For aggressive browning, reach for heavy cast iron, carbon steel, or thick-gauge stainless steel.
  • Cast Iron: While iron is technically a mediocre thermal conductor compared to copper or aluminum, it has high volumetric heat capacity. It holds a tremendous reserve of thermal energy, meaning its surface temperature barely flinches when cold meat makes contact.
  • Carbon Steel: Heavier and more responsive than cast iron, carbon steel seasons quickly to form a slick polymerized oil layer while retaining the high thermal density required for high-velocity browning.
  • Stainless Steel: Stainless steel promotes fond formation—the sticky, caramelized browned bits left behind on the pan floor that form the foundation for rich pan sauces deglazed with wine, stock, or shallots.
Avoid non-stick coatings for aggressive searing. The synthetic polymers that make Teflon slippery begin degrading at temperatures around 500 degrees Fahrenheit, releasing toxic fumes and losing their non-stick properties long before achieving an exceptional crust.

Fat as a Thermal Bridge

Placing dry meat directly onto dry metal creates an imperfect connection. At a microscopic level, both the bottom of the pan and the surface of a cut of meat are jagged, uneven landscapes full of peaks and valleys. If you cook without fat, heat transfers only where these microscopic peaks collide, leaving the recessed valleys pale and undercooked.
High-smoke-point oil acts as a liquid thermal conductor. It fills the microscopic air pockets between the food and the skillet, distributing heat uniformly across every square millimeter of surface area.
Select neutral fats with high thermal stability, such as avocado oil, clarified butter (ghee), or refined beef tallow. Extra-virgin olive oil and unclarified butter contain water, free fatty acids, and milk solids that burn and turn bitter well before the pan reaches optimal searing temperatures.

Tactical Mechanics: Flipping, Pressure, and Basting

Once the meat enters the pan, how you manipulate it determines whether you achieve an edge-to-edge medium-rare or a thick, overcooked gray band beneath the crust.

The Frequent-Flip Technique

A long-standing piece of kitchen lore insists that steaks should only be flipped once. Food science has thoroughly disproven this rule.
When meat sits untouched on a searing surface for minutes at a time, intense heat penetrates deep into the muscle, cooking a thick layer of exterior tissue well past your target doneness before the outer edge develops an adequate crust.
By flipping the meat every thirty to forty-five seconds, you expose each side to intense, short bursts of heat. While one side faces down to brown, the cooling side sheds residual surface heat into the air, preventing an aggressive thermal wave from driving inward. This approach builds a deep, crisp crust roughly thirty percent faster while keeping the internal gray band remarkably thin.

Uniform Contact and Surface Pressure

As muscle fibers heat up, they contract, often causing flat steaks, chicken cutlets, and fish fillets to cup, curl, or bow upward. This lifting action breaks contact with the pan, leaving the center unseared.
Use a heavy, flat burger press, a small cast-iron skillet, or firm downward pressure with an offset spatula for the first thirty seconds of cooking. This pins the entire surface area against the hot fat, ensuring a flat, uniform sear across the whole cut.

The Butter Baste Finish

While whole butter burns if used as the initial searing medium, it is the ultimate tool for finishing a sear.
During the final two minutes of cooking, drop the pan temperature slightly, tilt the skillet, and add two tablespoons of cold unsalted butter along with smashed garlic cloves and woody herbs like thyme or rosemary.
As the butter melts and foams, its whey proteins and lactose undergo their own rapid Maillard reaction, turning nutty and golden. Spooning this bubbling, aromatic foam over the top of the meat bathes the crust in a cascading wave of caramelized dairy solids, deepening the crust’s color and introducing complex, nutty top notes that oil alone cannot replicate.

Modulating pH for Accelerated Browning

One of the lesser-known variables influencing the Maillard reaction is ambient pH. The chemical cascade accelerates dramatically in alkaline environments, where amino acids exist in an unprotonated state that readily binds with reducing sugars. Conversely, acidic environments slow the reaction down significantly.
Understanding this dynamic allows you to manipulate browning across different culinary applications:
  • Baking Soda on Ground Meat: Tossing ground beef or pork with a tiny pinch of baking soda—roughly one-third of a teaspoon per pound of meat—and letting it sit for fifteen minutes raises the surface pH. When dropped into a hot pan, the meat browns aggressively in half the time, developing rich savory flavor before moisture weeps out and boils the batch.
  • Crispy Poultry Skin: Dusting chicken wings or turkey skin with a mixture of salt and a small amount of aluminum-free baking powder raises the surface pH while absorbing moisture. The alkaline environment weakens peptide bonds, encouraging blistered, crackling, deeply browned skin in a hot oven.
  • Marinade Timing: If your marinade relies heavily on acidic liquids like lemon juice, vinegar, or yogurt, wipe the meat completely dry before searing. Heavy acids actively inhibit the Maillard reaction, delaying browning and encouraging surface steaming.
Mastering the sear is never an accident of luck or brute heat. By systematically stripping away surface moisture, selecting dense cookware, leveraging fat as a thermal bridge, and managing heat through active technique, you turn the complex physics of the Maillard reaction into an everyday kitchen reflex.
read more
Bar & Wine

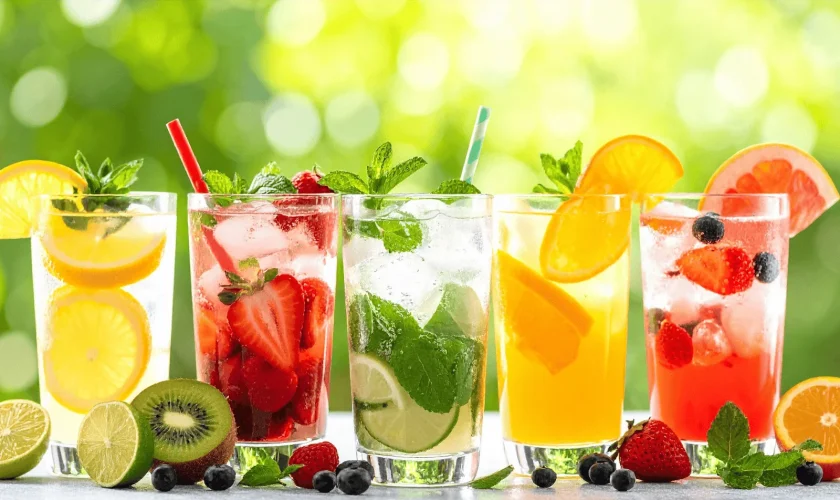
The Botanical Canvas: Elevating Craft Mocktails with House-Made Herbal Syrups

For years, non-alcoholic drink menus treated sobriety as a culinary compromise. If you opted out of alcohol at a high-end restaurant or cocktail lounge, the bartender usually steered you toward a hurried concoction of club soda, pineapple juice, and a splash of grenadine, or perhaps a sweet muddle of bruised mint drowned in commercial ginger beer. These drinks lacked intention, complexity, and above all, the balanced architecture of a genuine cocktail.
That dynamic has shifted completely. The modern beverage program now approaches zero-proof mixology with the same technical rigor applied to vintage spirits and barrel-aged amaros. Modern drinkers demand beverages that offer sensory engagement, dynamic acidity, aromatic depth, and a deliberate finish that lingers on the palate.
At the center of this movement lies botanical extraction. By capturing the volatile essential oils of herbs, edible flowers, roots, and spices inside concentrated syrups, home bartenders and professional mixologists can build complex, layered drinks that completely transcend the tired juice-and-soda paradigm.

The Architecture of Zero-Proof Balance

To craft a compelling alcohol-free cocktail, you must first understand the structural role that ethanol plays in traditional drinks. Alcohol is not merely an intoxicant; it is a powerful flavor solvent and a textural agent. It possesses viscosity, creates a warming sensation known as chemesthesis, and carries aromatic compounds directly to the olfactory receptors in the back of your throat.
When you remove spirits from a drink, the glass loses its structural spine. Watery thinness sets in, sweetness becomes cloying, and the liquid disappears from the tongue without leaving a lasting impression.
Overcoming this absence requires assembling four distinct pillars: viscosity, bright acidity, tannic astringency, and layered aroma. Botanical syrups solve two of these problems simultaneously. A properly formulated syrup provides the physical body that coats the palate, while the infused plant compounds release intricate aromatic top notes that mimic the complexity of distilled spirits.

The Science of Crafting Botanical Syrups

Extracting botanical essence into sugar syrup is an exercise in temperature control. Different plant tissues surrender their aromatic oils under very different thermodynamic conditions. Subject delicate leaves to excessive heat, and you end up with bitter, stewed compost; fail to apply enough heat to fibrous barks or roots, and the flavor remains trapped inside the plant cell walls.

Rich Simple vs. Standard Simple

In traditional cocktail work, standard 1:1 simple syrup—equal parts sugar and water by weight—is the everyday default. In craft mocktail production, however, a 2:1 rich simple syrup is vastly superior.
A two-to-one ratio yields a denser, more viscous liquid that mimics the heavy mouthfeel of 80-proof spirits. Furthermore, the higher concentration of sucrose lowers the water activity of the syrup, extending its refrigerator shelf life for months without the need for artificial preservatives. Most importantly, using a richer syrup means you can introduce substantial botanical flavor and body with a smaller volume of liquid, preventing your finished drink from becoming overly diluted when shaken or stirred over ice.

Cold Maceration for Resinous Herbs

Tender herbs like basil, tarragon, and mint, as well as resinous botanicals like rosemary and spruce, react poorly to prolonged boiling. High heat causes their bright monoterpenes to flash off while breaking down chlorophyll into dull, swampy flavor compounds.
For these aromatics, cold maceration or a rapid hot-steep method yields the cleanest extraction:
  • The Rapid Blanch: For leafy herbs like basil or mint, blanch the leaves in boiling water for five seconds, then plunge them into an ice bath. This deactivates polyphenol oxidase, the enzyme responsible for browning, locking in a vibrant emerald hue and a crisp, garden-fresh flavor before you blend the herbs into cold simple syrup and strain through a fine mesh.
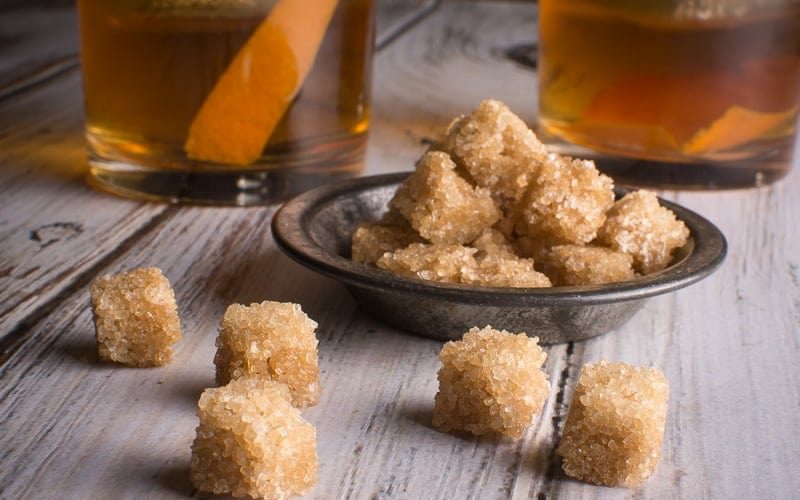
  • The Oleo-Saccharum Technique: For woody herbs and citrus rinds, toss the fresh botanicals directly in dry granulated sugar and let them sit at room temperature for several hours. The hygroscopic sugar draws essential oils out of the plant cells via osmosis, creating an intensely aromatic botanical slurry before you add warm water to dissolve the crystals.

Gentle Decoction for Roots, Spices, and Barks

Tougher plant materials, such as dried angelica root, crushed juniper berries, cinnamon bark, or dried hibiscus calyces, require gentle simmering to break down fibrous lignin and release their water-soluble tannins. Simmer these ingredients in water over low heat for fifteen to twenty minutes before stirring in your sugar. This decoction process pulls out the underlying astringency and bitter bite that zero-proof drinks desperately need to simulate the throat-feel of an aged spirit.

Three Essential Botanical Syrups to Keep on Hand

Before mixing cocktails, prepare these three versatile house syrups. Each provides a distinct sensory palette: one woodsy and coniferous, one delicate and floral, and one tart and tannic.

Rosemary and Douglas Fir Syrup

This syrup channels the alpine, evergreen notes typically found in dry London gins.
  • 1 cup water
  • 2 cups granulated pure cane sugar
  • 3 large sprigs fresh organic rosemary, lightly bruised
  • 2 tablespoons culinary-grade dried Douglas fir needles or pine tips
  • 1 wide strip lemon peel, pith removed
Bring the water to a boil in a small saucepan, then remove it from the heat. Add the bruised rosemary, fir needles, and lemon peel. Cover the pan and let the botanicals steep undisturbed for twenty-five minutes. Strain the fragrant infusion through a cheesecloth-lined sieve, pressing gently on the herbs. Return the infused warm liquid to the pan, add the sugar, and stir over gentle, low heat just until the sugar granules dissolve completely. Bottle, cool, and refrigerate.

Chamomile, Lavender, and Toasted Coriander Syrup

This blend delivers soft, golden honeyed notes paired with crisp citrus and floral undertones.
  • 1 cup water
  • 2 cups turbinado or raw Demerara sugar
  • 3 tablespoons dried whole chamomile flowers
  • 1 teaspoon culinary dried French lavender buds
  • 1 teaspoon whole coriander seeds
In a dry pan, lightly toast the coriander seeds until fragrant, then crack them using a mortar and pestle. Bring the water to a rolling boil, shut off the flame, and stir in the toasted coriander, chamomile, and lavender. Keep the lid on the pot and steep for fifteen minutes; exceeding this time can pull out soapy notes from the lavender. Strain the liquid, stir in the raw sugar until dissolved, and chill.

Spiced Hibiscus and Sumac Syrup

Vibrant, deep ruby, and intensely tart, this syrup introduces natural tannins and a sharp, cranberry-like acidity.
  • 1 cup water
  • 2 cups granulated sugar
  • 1/2 cup dried whole hibiscus flowers
  • 1 tablespoon ground wild sumac
  • 1/2 teaspoon whole pink peppercorns, lightly crushed
Combine the water, hibiscus, sumac, and pink peppercorns in a saucepan. Bring to a low simmer for ten minutes. The liquid will turn a luminous, opaque magenta. Remove from the heat, strain through a coffee filter or tight mesh to remove the fine sumac sediment, and stir in the sugar until clear.

Four Signature Craft Mocktail Formulations

With botanical syrups in your bar inventory, you can balance drinks with the same deliberate technique used by elite cocktail lounges.

1. The High Desert Collins

A refreshing, effervescent highball that balances piney botanicals with sparkling minerality and sharp citrus.
  • 1.5 ounces Rosemary and Douglas Fir Syrup
  • 1.0 ounce fresh Meyer lemon juice, fine-strained
  • 2 drops twenty-percent saline solution (four parts warm water to one part sea salt)
  • 4.0 ounces chilled Topo Chico or high-carbonation mineral water
  • Garnish: Charred rosemary sprig and an expressed lemon wheel
Combine the botanical syrup, fresh Meyer lemon juice, and saline solution in a cocktail shaker filled with solid ice cubes. Shake briskly for eight seconds to chill without over-diluting. Strain into a tall Collins glass packed with clear spear ice. Top slowly with the sparkling mineral water to preserve carbonation, and lift gently from the bottom with a bar spoon once to integrate. Light the tip of a fresh rosemary sprig with a kitchen match for three seconds, blow out the flame, and rest the smoking herb across the rim.

2. The Velvet Meadow Sour

A textural triumph that combines the calming florals of chamomile with rich, velvety foam and deep tannic grip.
  • 1.0 ounce Chamomile, Lavender, and Toasted Coriander Syrup
  • 0.75 ounce fresh lemon juice
  • 1.5 ounces chilled, strong-brewed lapsang souchong or rooibos tea
  • 0.75 ounce aquafaba (the strained liquid from canned chickpeas)
  • Garnish: Edible dried cornflowers or three drops of alcohol-free aromatic bitters
Combine all ingredients in a cocktail shaker without ice. Perform a dry shake for fifteen seconds; the friction and agitation allow the proteins in the aquafaba to unfold and trap micro-bubbles, building a dense foam. Open the shaker, fill it completely with cubed ice, and wet shake vigorously for another twelve seconds until the tin is frosty. Fine strain through a Hawthorne strainer and a tea mesh into a chilled coupe glass. The foam will rise to the surface, creating a pristine, two-toned head. Rest drops of bitters on the surface foam and pull a cocktail pick through them to create decorative swirls.

3. The Crimson Apertif Spritz

Modeled after traditional Italian aperitivo culture, this drink relies on the dry astringency of hibiscus and the biting effervescence of dry tonic water.
  • 1.25 ounces Spiced Hibiscus and Sumac Syrup
  • 1.0 ounce fresh pink grapefruit juice
  • 0.5 ounce unsweetened pure cranberry juice
  • 3.0 ounces premium Indian tonic water
  • Garnish: Dehydrated blood orange wheel and fresh rosemary
Fill a large stem glass or wine goblet to the brim with large cubed ice. Pour the hibiscus syrup, grapefruit juice, and unsweetened cranberry juice directly over the ice. Stir gently to chill the base. Pour the chilled tonic water down the twisted stem of a bar spoon to keep the effervescence intact. Give the drink one gentle fold from the bottom. Garnish with the dehydrated citrus wheel floating on the surface.

4. The Verdant Garden Swizzle

Herbaceous, crisp, and slightly savory, this drink captures the sensory experience of walking through an herb garden in late spring.
  • 1.0 ounce cold-pressed English cucumber juice
  • 1.0 ounce fresh lime juice
  • 1.0 ounce Thai basil and black pepper syrup
  • 2.0 ounces club soda
  • Garnish: Cucumber ribbon pinned to the inside of the glass and a sprig of Thai basil
Prepare the syrup ahead of time by blending blanched Thai basil and a half-teaspoon of cracked black peppercorn into cold 2:1 simple syrup, then straining clean. To build the drink, curl a thin cucumber ribbon around the inside walls of a double rocks glass, then pack the glass with finely crushed pebble ice. Add the cucumber juice, lime juice, and basil syrup. Insert a swizzle stick or bar spoon and spin it rapidly between the palms of your hands to churn the liquid with the crushed ice, creating a heavy frost on the outside of the glass. Top with club soda, pack a crown of extra crushed ice on top, and slap a fresh basil bouquet between your palms to release its aromatics before tucking it into the ice.

Secret Weapons of the Non-Alcoholic Bartender

While syrups and juices form the bulk of the drink, professional mocktail construction relies on tiny details to cross the line from good to unforgettable.
  • Saline Solution: Alcohol moderates sweet and bitter receptors on the tongue. Without it, syrups can taste heavy. Adding one or two drops of a twenty-percent saline solution suppresses harsh, sharp bitterness while rounding out sweet edges, making herbal and floral flavors pop with razor clarity.
  • Tannic Teas as Modifiers: When a recipe feels thin, swap standard water for cold-brewed unflavored black tea, hojicha, or genmaicha. The natural polyphenols in tea create a slight, pleasant drying sensation on the gums and tongue, replicating the sensory weight of wine tannins or oak aging.
  • Ice Density: Water-based drinks melt standard residential crescent-ice quickly, turning a balanced craft mocktail into cold, diluted sugar water in five minutes. Invest in silicone molds that produce solid, two-inch clear ice cubes or spears. Dense, clear ice melts slowly, preserving the drink’s intentional proportions down to the final sip.
Crafting sophisticated mocktails is not an exercise in subtraction. It is an art of intentional layering, where the botanical richness of the garden meets the precision of culinary science, resulting in a glass that honors the drinker with every single sip.
read more
Food

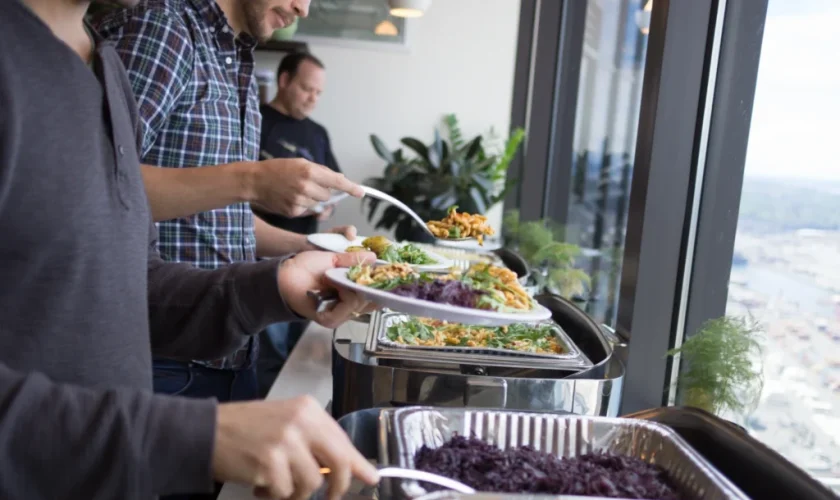
Surviving the December Surge: How Catering Operations Handle Rush Orders Without Burning Out

Between the second week of November and New Year’s Eve, the commercial catering landscape operates under an entirely different set of physics. The corporate calendar compresses into a frenzied window of cocktail receptions, board luncheons, and lavish holiday galas. Meanwhile, private clients make frantic calls trying to secure staff and canapes for holiday parties they forgot to plan in October.
For catering directors and executive chefs, this period represents the financial high-water mark of the entire fiscal year. A successful fourth quarter can float an operation through the quiet lulls of January and February. Yet that same revenue surge brings acute operational peril. When incoming bookings outpace kitchen capacity, the system begins to fracture. Prep cooks work eighteen-hour days on concrete floors, delivery vans sit stuck in seasonal gridlock, execution slips on banquet lines, and talented kitchen talent leaves in frustration come January.
Surviving the holiday rush without destroying your staff or compromising food quality is not a matter of sheer endurance. It is an exercise in ruthless system design, intelligent menu engineering, and strict boundary control.

The Myth of Boundless Capacity: Establishing a Triage Protocol

The most dangerous instinct in hospitality is the reflexive desire to say yes to every incoming dollar. When a long-standing corporate client calls on a Tuesday morning begging for a seated three-course dinner for sixty people on Thursday night, the temptation to squeeze it into the schedule is immense. However, uncontrolled volume does not scale linearly; it scales chaotically.
Every unvetted rush order steals prep hours from existing, meticulously planned events, creating a domino effect of delayed pack-outs and panicked off-site setups. To maintain control, successful catering operations establish an explicit order triage matrix well before the December crunch begins.

The 72-Hour Standard Menu Lock

Late-entry clients must not be granted full creative license. When a booking arrives inside a seventy-two-hour window, the custom proposal process must shut down completely. Instead, funnel the client toward a curated, pre-engineered express holiday menu.
This roster should feature dishes that draw exclusively from raw ingredients the kitchen already buys in bulk for other contracted events. If your primary corporate buffet on Thursday calls for cider-braised pork belly and roasted winter squash, the last-minute cocktail party ordered for the same afternoon should be offered pork belly skewers with a spiced apple glaze and squash arancini. By forcing inventory overlap, a rush order ceases to be an administrative disruption and becomes an incremental scaling of current prep batches.

Tactical Surge Pricing as a Traffic Controller

Rush fees should not merely serve as profit padding; they must function as an operational dampener. Implementing a progressive surcharge schedule—such as a twenty percent premium for orders placed inside five business days, climbing to thirty-five percent inside forty-eight hours—accomplishes two vital tasks.
First, it forces the client to decide whether their request is an absolute business necessity or merely a whim that could easily shift to an open date in early January. Second, when clients do accept the surcharge, those funds must be routed directly into tangible support systems: funding dedicated third-party logistics couriers, hiring specialized dishwashing labor, or providing immediate shift bonuses to the culinary crew carrying the extra physical load.

Modular Kitchen Engineering: Building the Bulletproof Prep Line

High-stress catering failures rarely happen at the plating line; they happen forty-eight hours earlier during production. Trying to execute complex, multi-touch hors d’oeuvres during a peak holiday rush is a recipe for disaster. If an appetizer requires four cooks to spend two hours with tweezers and squeeze bottles on-site, that item has no place on a December banquet event order.
Protecting the kitchen from exhaustion requires shifting to a modular component production model.

Maximizing Thermal Stability and Holding Windows

Holiday menus must favor dishes that maintain peak culinary integrity across broad temperature and time windows. Delicate, pan-seared proteins like duck breast or Chilean sea bass demand split-second timing that falls apart the moment a client runs forty minutes late with their holiday awards presentation.
Replace temperamental proteins with luxurious braises, confits, and sous-vide preps. Short ribs braised in red wine and pomegranate, slow-roasted heritage pork shoulders, and confit chicken thighs can be cooked days in advance, chilled, portioned, and brought to temperature in holding ovens with zero loss of moisture or tenderness. In fact, these dishes often deepen in flavor after twenty-four hours in refrigeration, providing a superior guest experience while removing the frantic, minute-by-minute anxiety of off-site searing.

Batching Cold Larder and Pastry in Advance

Cold larder items, dips, terrines, compound butters, and vinaigrettes should be batched and stored in standardized, clearly labeled cambros days ahead of time. Similarly, dessert courses should be engineered around items that freeze flawlessly or hold at room temperature without weeping. Mini tart shells can be baked weeks in advance and stored in airtight containers, needing only a fast pipe of citrus curd and a quick torching of meringue hours before service.
When your team arrives at the commissary on a chaotic Saturday morning, sixty percent of the day’s work should already be finished, packed, and resting in the walk-in.

Shift Ergonomics and the Human Cost of Overtime

Overtime pay is a standard reality of holiday catering, but fatigue carries a compounding cost. Past a certain threshold of physical and mental exhaustion, knife accidents increase, food safety protocols slip, and interpersonal friction in the kitchen spikes. Protecting your team from burnout requires structured, intentional management of human energy.

Staggered Production Waves

Avoid the exhausting pattern where the entire crew clocks in at 6:00 AM and stumbles out the door together at midnight. Implement rolling, specialized shifts:
  • The Graveyard or Early Prep Crew: Focuses exclusively on bulk vegetable fabrication, sauce reductions, stocks, and foundational prep, working in an empty, quiet kitchen without the distraction of ringing phones or frantic pack-outs.
  • The Mid-Day Assembly Team: Takes over prep tables to execute portioning, skewering, baking, and direct event pack-outs.
  • The Logistics and Event Crew: Arrives fresh in the early afternoon, completely unburdened by morning prep work, dedicated solely to loading transport vans, traveling to venues, managing guest service, and breaking down the room.
By separating the heavy physical labor of preparation from the customer-facing energy of service, you prevent front-line event staff from showing up to high-stakes parties already running on empty.

Non-Negotiable Recovery Protocols

When consecutive twelve-hour shifts become unavoidable, management must make active investments in staff wellness. Keep the kitchen stocked with clean, accessible hydration options beyond lukewarm tap water and energy drinks. Institute a mandatory, coordinated family meal where every cook, driver, and manager sits down away from their stations for twenty minutes to eat real, nourishing food.
Most importantly, establish a guaranteed rest window. No team member who clocks out after an event breakdown at 1:00 AM should ever be scheduled on a morning delivery run at 7:00 AM. A mandatory eight-to-ten-hour rest gap must remain an untouchable rule, enforced by leadership regardless of how packed the calendar appears.

Logistics: Where Rushes Win or Lose

More catering catastrophes occur in the loading dock than over the stove. A forgotten crate of chafing fuel, missing hotel pan lids, or a driver stuck on an icy arterial road can derail an event long before the first guest arrives.
When accommodating rush orders, double down on your transport logistics:
  • Color-Coded Event Staging: Dedicate specific floor zones in the staging area for each event. Every cambro, dry-storage speed rack, and linen crate should carry color-coded tags matching the master banquet event order. A rush order should never share a speed rack with a previously scheduled event.
  • Standardized Van Manifests: Every delivery driver must work off a laminated, itemized checklist that requires a physical signature from both the expediting chef and the driver before the back door of the vehicle closes.
  • Redundant Equipment Reserves: Maintain a sealed, permanent emergency kit in every transport vehicle. This crate should contain extra butane canisters, utility tongs, carving knives, clean side towels, trash bags, extension cords, basic first aid items, and emergency signage. If a rush order arrives at a venue missing a crucial service utensil, the crew can solve the problem instantly from the truck without making a panicked call back to the commissary.

Preserving the Team for the New Year

The true mark of a premier catering business is not how much revenue it captures during the December peak, but the health and morale of its workforce when the calendar flips to January. An operation that posts record fourth-quarter profits only to lose its head chef, sous chef, and lead event captains to career exhaustion has not won; it has merely mortgaged its long-term stability for short-term cash flow.
By treating rush orders as calculated exceptions rather than everyday emergencies, designing modular menus that protect prep time, and vigorously defending staff rest cycles, catering operators can conquer the holiday season with both their balance sheet and their team intact.
read more
Food

Smoke, Spice, and Survival: The Untold History Behind Southeast Asia’s Street Stalls

The sensory assault of a Southeast Asian street corner at dusk is unmistakable. Charcoal smoke curls upward through strings of fluorescent bulbs, carrying the sharp sting of charred bird’s eye chilis, the earthy musk of crushed galangal, and the sweet perfume of coconut oil sizzling against cast iron. Woks clang rhythmically against burner rings, cleavers rhythmically strike thick wooden chopping blocks, and the murmur of conversation hums over tables crowded with low plastic stools.
To an outsider, this kinetic theater looks like an organic celebration of everyday indulgence. Travelers flock to Bangkok, George Town, Hanoi, and Singapore to taste what many consider the most dynamic food culture on the planet. Yet the humble street stall was never created as a tourist attraction or an aesthetic choice. It began as an instrument of working-class survival, an economic lifeline forged by waves of migration, colonial disruption, and the rapid rise of modern trade ports.
Every bowl of fragrant broth ladled from an aluminum pot and every skewer turned over glowing coconut embers carries the physical memory of regional history. The stalls are living archives of cross-cultural adaptation, where global maritime empires met the resilience of ordinary people who had to eat quickly, cheaply, and well.

The Era of the Shoulder Pole: Mobility Built on Necessity

Before street food occupied permanent sidewalk alcoves or brightly lit hawker complexes, it was entirely mobile. In the nineteenth and early twentieth centuries, the primary vehicle for hot food across Southeast Asia was the bamboo shoulder pole.
Known across different languages—as the pikul in Malaya and the Dutch East Indies, the gánh in Vietnam, and the haap among Cantonese-speaking communities—this simple implement consisted of a flexible bamboo slat balanced across a vendor’s neck. Suspended from each end hung two counterbalanced containers. One side held a small brazier fueled by charcoal or wood alongside a pot of simmering stock; the other carried ceramic bowls, raw noodles, condiments, clean water, and a wooden wash basin.
These itinerant hawkers were the original gig-economy workers. They followed the rhythms of manual labor, trailing port coolies unloading spice cargo in Batavia, tin miners in the Malay Peninsula, and stevedores hauling rice sacks along the Saigon River. These laborers, working twelve-hour shifts under brutal conditions, rarely had access to domestic kitchens or the means to cook at home.
In Penang, this era gave birth to nasi kandar. Indian Muslim migrants hoisted woven baskets filled with steamed rice and dense, fragrant curries balanced on their shoulders, walking the docks to feed dockhands. The physical presence of the pole may have largely vanished into history, but the term itself—kandar, the Malay word for carrying on a shoulder pole—remains permanently etched into the culinary vocabulary of the region.

The Diaspora in the Wok: How Chinese Migration Reshaped the Plate

While native Southeast Asian cuisines relied on grilling, boiling, and pounding spices in stone mortars, the introduction of the high-heat stir-fry and refined noodle craft arrived with massive waves of southern Chinese immigration between the 1850s and 1930s. Fleeing political turmoil, drought, and economic collapse in Guangdong and Fujian provinces, millions of Hokkien, Teochew, Hakka, Cantonese, and Hainanese workers poured into maritime trading hubs.
These immigrants carried few possessions, but they brought culinary memory and iron woks. Once settled, they did not simply recreate the foods of their ancestral villages; they adapted them aggressively to survive in tropical climates using local ingredients.

The Alchemy of Adaptation

Pork lard collided with local tamarind pulp, fermented shrimp paste, and indigenous shallots. This collision birthed dishes like char kway teow, flat rice noodles seared over blistering heat with dark soy, cockles, and garlic chives. The signature flavor of these dishes became known as wok hei, or the breath of the wok—the complex smoky aroma achieved when microscopic aerosolized oil droplets combust over intense heat.
Hainanese immigrants, arriving later than the Hokkiens and Teochews, found many commercial trades already dominated by earlier arrivals. Consequently, many took jobs as domestic cooks in British colonial households and hotels. Drawing on European roasting and poaching methods while utilizing their native techniques for Wenchang chicken, they pioneered Hainanese chicken rice. They poached poultry with ginger and scallions, then cooked the leftover rice directly in the rendered chicken fat and stock, creating a rich, aromatic staple that remains an obsession across Malaysia and Singapore.

The Invention of Pad Thai

Not all street staples evolved purely through organic migration; some were manufactured by state mandate. In the late 1930s, Thai Prime Minister Plaek Phibunsongkhram launched a sweeping nationalist campaign to modernize the country and forge a unified Thai identity. Facing a domestic rice shortage, the government actively discouraged the consumption of whole rice, urging citizens to eat rice noodles instead, which utilized broken rice grains and stretched food supplies.
The regime sponsored a nationwide recipe contest that produced kway teow pad Thai, later shortened to simply pad thai. The dish utilized Chinese rice noodles and wok stir-frying techniques, but re-engineered the flavor profile entirely around quintessential Thai tastes: the sour punch of tamarind, the salty depth of fish sauce, palm sugar, dried shrimp, and crushed peanuts. Street carts were systematically licensed and deployed across Bangkok to promote the dish, effectively inventing a national culinary tradition in the span of a single decade.

Colonial Encounters and Subverted Ingredients

European colonial rule brought new administrative systems, but it also introduced foreign agricultural products and dining habits that street cooks systematically disassembled and reassembled on their own terms.

The Metamorphosis of the French Baguette

Nowhere is this subversion clearer than in the story of the banh mi. French colonizers brought wheat flour, liver pâté, and charcuterie to Indochina in the nineteenth century, reserving these luxuries primarily for European settlers who looked down upon local rice-based diets. For decades, the baguette was eaten as a French novelty, slathered in European butter and ham.
Following the defeat of French forces in 1954, Saigonese bakers made the bread their own. They altered the dough formula by blending wheat flour with affordable rice flour, producing an airy, featherweight crumb encased in an impossibly crisp, crackling crust capable of withstanding tropical humidity. Rather than serving the fillings on a plate in the Continental style, street carts stuffed the warm bread with sour pickled daikon and carrots, fresh cilantro, fiery native chilis, and savory pork roll. The aristocratic French breakfast had been weaponized into the ultimate handheld working-class lunch.

Dutch Rijsttafel and the Fire of Satay

In Indonesia, centuries of Dutch presence created a culinary exchange that flowed both ways. While Dutch administrators appropriated native dishes into lavish banquets known as rijsttafel, street vendors turned meat skewers into an art of immediate public consumption.
Influenced by early Arab and Indian traders who introduced kebabs, Javanese street cooks mounted portable grills fueled by glowing coconut shell charcoal. They coated skewered goat, chicken, and beef in sweet kecap manis—a thick, fermented soy sauce infused with palm sugar—and finished them with thick, spicy peanut sauces flavored with lime leaves. The street skewer offered a fast, democratized taste of luxury for ordinary urban workers who could not afford to roast whole cuts of livestock.

The Indian Spice Routes: From Mamak Stalls to Roti Canai

Along the Strait of Malacca, Indian traders, dockworkers, and convict laborers established communities that fundamentally transformed the region’s culinary geography. Particularly influential were the Tamil Muslims, whose distinct commercial spaces evolved into mamak stalls.
These open-air establishments became communal crossroads that operated outside rigid class boundaries. The cornerstone of the mamak repertoire is roti canai, a flaky, layered flatbread derived from South Indian parotta. To watch a roti vendor at work is to witness physical poetry: dough balls enriched with ghee are slapped onto oiled stainless steel, stretched, and repeatedly flipped through the air until translucent before being folded into pockets and griddled.
Served alongside aromatic dhal, fish curry, or spicy sambal, roti canai provided laborers with sustained caloric fuel at negligible cost. Accompanying these breads was teh tarik, or pulled tea. Made by vigorously pouring a mixture of black Ceylon tea and sweetened condensed milk back and forth between two stainless steel pitchers from heights of several feet, the process cools the liquid and aerates it, producing a thick, frothy head. These stalls evolved into around-the-clock social sanctuaries where individuals of diverse ethnic backgrounds congregated over shared tables.

The Evolution of the Street Space: Hygiene, Heritage, and Hawking

As the twentieth century closed, Southeast Asia’s booming economies faced a logistical dilemma. Cities that once expanded without restriction began modernizing their urban cores. The millions of street stalls that had sustained populations through industrialization were suddenly viewed by municipal planners as traffic bottlenecks and sanitation hazards.
Singapore approached this friction with structural intervention. Beginning in the late 1960s, the government systematically cleared informal street peddlers from riverbanks and roadsides, relocating them into purpose-built hawker centers. These public facilities featured clean running water, centralized waste management, and subsidized stall rents. By institutionalizing street food, Singapore preserved recipes that had crossed oceans a century earlier while establishing a model that earned recognition on the UNESCO Representative List of the Intangible Cultural Heritage of Humanity.
In cities like Bangkok, Hanoi, and Jakarta, street food retains a more untamed, sidewalk-rooted presence. Despite periodic municipal crackdowns aimed at reclaiming pedestrian corridors, the street stalls endure because they remain fundamentally indispensable to the urban fabric. They provide affordable, freshly cooked sustenance in dense metropolitan centers where small apartments often lack full kitchens, and long commutes make home cooking impractical.
The street food stalls of Southeast Asia are not remnants of a primitive past, nor are they merely photo opportunities for curious tourists. They are monuments to human resilience. Every plate of spiced noodles, every blistered skewer of satay, and every crusty, herb-packed sandwich represents an enduring answer to historic hardship—crafted by immigrants, laborers, and visionary home cooks who proved that world-class culinary art does not require white tablecloths or silver spoons.
read more
Bakery & Cake

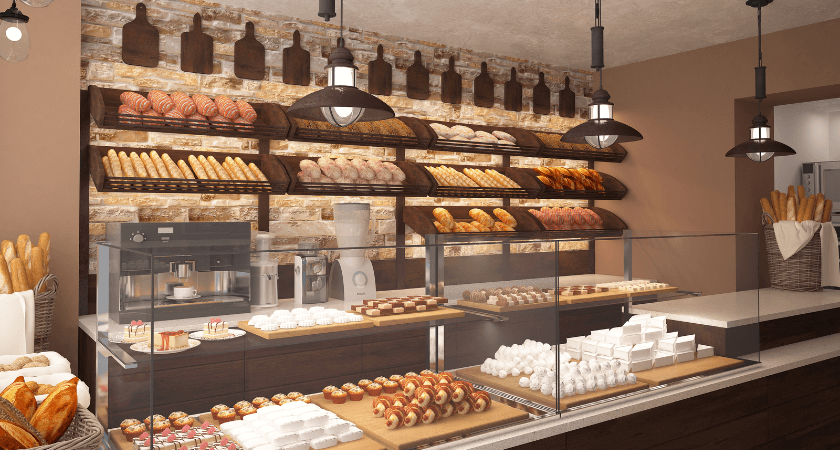
Curating the Sidewalk Stage: How to Design a Bakery Display Window That Stops Foot Traffic

A pedestrian walking down a commercial street takes roughly three to five seconds to pass an independent storefront. Within that fleeting window, the human brain processes visual cues, registers appetizing aromas if the front door is propped open, and makes an instantaneous, subconscious calculation about whether to break stride or keep moving.
For an independent bakery, the front display window is not merely an architectural barrier keeping the weather out. It is a live stage, a sensory preview, and the single most cost-effective marketing asset the business owns. While digital marketing and social media accounts generate awareness, the display window converts foot traffic into paying customers at the exact moment of intent.
Yet all too often, bakeries treat their front glass as an afterthought. Windows become cluttered with faded promotional flyers, crowded with mismatched platters, or neglected under harsh, unflattering lighting that turns golden-brown crusts into an unappealing beige. Designing an arresting display requires a calculated blend of visual merchandising principles, food safety logistics, and lighting design, all working in unison to turn casual sidewalk strollers into daily regulars.

The Geometry of Sightlines: Mapping the Pedestrian Gaze

A successful bakery window directs the viewer’s eye along an intentional path rather than bombarding it with visual noise. When pedestrians approach a window, their gaze naturally tracks in a sweeping motion, generally settling first on items positioned within an eye-level band between four and five and a half feet from the pavement. Anything placed flat on the floor of a low window well is effectively invisible from six feet away.
To capture attention across varying distances, arrange the space using a three-tier elevation model.

The Foreground: Intimate Details

Positioned closest to the glass and slightly lower in the sightline, the foreground should showcase smaller, high-detail treats that reward close inspection. Intricate French macarons, individually glazed petit fours, hand-piped sugar cookies, or glossy fruit tartlets thrive here. Passersby who slow down to inspect these items will naturally step closer to the window, crossing the threshold from distant observer to engaged viewer.

The Midground: The Hero Focal Point

The midground holds the structural anchor of your display. This is the visual heavyweight that pedestrians spot from twenty feet down the sidewalk. A towering multi-tiered celebration cake, an overflowing wicker cornucopia of braided challah, or an architectural pyramid of sourdough boules belongs in this central zone. Every successful window needs a single, undeniable hero element; attempting to give equal prominence to every product on the menu creates a chaotic blur where nothing stands out.

The Background: Depth and Context

The rear of the display connects the street to the interior atmosphere of the shop. Rather than constructing a solid, opaque wall that blocks views into the dining room or kitchen, consider an open or semi-translucent backdrop. Seeing bakers sliding peel boards into a hot deck oven, or catching a glimpse of customers enjoying coffee at small marble tables, provides dynamic motion. This visual transparency signals freshness and energy, inviting the pedestrian to become part of the experience inside.

Illuminating the Crumb: Lighting Physics and Color Temperature

Even the most exquisite kouign-amann looks dull under poor lighting. Bakeries deal with unique visual palettes dominated by rich caramel tones, deep chocolate glazes, and warm, golden-brown crusts resulting from Maillard browning. Standard cool-white fluorescent fixtures or generic commercial LEDs—often rated between 4000K and 5000K—drain the warmth from baked goods, casting a sickly, clinical blue hue over the entire display.
To make pastry crusts glisten and bread look freshly baked, prioritize lighting fixtures with a warm color temperature between 2700K and 3000K. This warm spectrum enhances natural amber, golden, and honey hues, making pastries look rich and inviting.
Equally important is the Color Rendering Index, or CRI. Standard commercial bulbs frequently carry a CRI rating of 70 to 80, which flattens nuances in color. Install specialized display spotlights with a CRI rating of 90 or above. High-CRI lighting reveals the true, vibrant reds of fresh strawberry tarts, the deep velvety brown of dark chocolate ganache, and the delicate dusting of powdered sugar across laminated croissants.
Directionality matters just as much as color balance. Flat, overhead downlighting casts harsh shadows that obscure interior layers. Instead, incorporate angled track spotlights focused on key hero products from a forty-five-degree angle. This cross-lighting creates subtle highlights and shadows along the ridges of braided doughs and scored crusts, emphasizing the artisan texture of your work.

Balancing Food Safety and Visual Realism

One of the greatest operational hurdles in bakery window design is the battle against environmental degradation. Direct sunlight, ambient summer heat, and fluctuating humidity levels quickly destroy fresh baked goods. Butter-rich pastries sweat and lose their crisp lamination, chocolate blooms with white fat crystals, fresh cream breaks down, and delicate royal icing melts.
Bakeries generally solve this dilemma through one of two operational strategies.

The Dummy Display Strategy

For intricate decorated cakes, seasonal showpieces, or items that must sit in unconditioned exterior windows, high-quality dummy displays remain the safest path. Cake dummies carved from dense polystyrene can be frosted with shortening-based mock buttercreams or wrapped in fondant treated with food-grade sealants to resist humidity.
When displaying artificial bread or pastry, modern faux-baked items crafted from polyurethane foam look remarkably indistinguishable from real loaves. If you choose this route, invest in professional-grade models; poorly molded plastic bread undermines consumer trust faster than an empty window.

The Rotational Live Display

If you prefer showcasing actual, edible bakes, treat the window as an active staging area that adheres to strict rotational schedules. Place real artisan loaves in the window during the morning rush, but swap them out or pull them before direct midday sun damages their appearance. For perishable cream items, invest in an integrated refrigerated window showcase that keeps items safe at 40 degrees Fahrenheit while maintaining anti-fog, double-pane display glass.
To mitigate direct thermal heat from the afternoon sun, install UV-filtering window film. These clear ceramic or nano-carbon coatings block up to 99 percent of ultraviolet rays and a significant portion of solar heat without darkening the glass or creating distracting exterior reflections.

Textural Contrast and Strategic Styling Props

A common misstep in bakery merchandising is placing brown items on brown surfaces. When golden sourdough loaves sit on raw butcher block wood against a tan brick wall, the products visually dissolve into the background.
Contrast is what makes food look appetizing from a distance. Pair golden-brown baked goods with cooler, textural surfaces that provide visual relief:
  • Honed white marble slabs that highlight dark crusts and glossy glazes
  • Matte dark slate or soapstone risers that create dramatic, high-contrast stages for dusted pastries
  • Brushed brass or blackened iron display stands that introduce crisp, clean lines without clashing with warm bakes
  • Pale linen fabric or unbleached cheesecloth draped loosely beneath woven baskets to soften hard shelf lines
When selecting decorative props, apply restraint. A single vintage wooden peel, an antique copper bowl holding whole vanilla beans, or a tidy bundle of dried wheat stalks communicates craft and heritage. Conversely, filling the window with plastic flowers, oversized plush toys, or irrelevant seasonal bric-a-brac distracts from the core product. Props should contextualize the baking process, never compete with the bakes themselves.

Legibility, Pricing, and the Psychology of Friction

A pedestrian admiring a display often experiences a moment of hesitation: What is that, and what does it cost?
When a window features no signage, prospective customers often assume the shop is either overwhelmingly expensive or difficult to navigate. Clear, elegant product identification eliminates that hesitation and lowers the barrier to entry.
Keep window signage minimal and legible from several feet away. Avoid handwritten paper tags with uneven cursive or flimsy adhesive labels that peel in the sun. Instead, opt for clean acrylic blocks, small porcelain card stands, or branded matte-black tags lettered in crisp white chalk or metallic ink.
Include the product name, a brief two-to-three-word description of its primary flavor profile, and the price. Highlighting distinct dietary callouts—such as naturally leavened, gluten-free, or plant-based—catches the eyes of consumers scanning the street for specific options that fit their lifestyle.

The Daily Maintenance Rhythm

A brilliant design concept falls apart without rigorous daily upkeep. Window displays sit mere inches from dusty streets, passing dogs, and fingerprint-prone children. The exterior glass requires daily morning washing to remove street grime, water spots, and smudges, while the interior surface must be wiped down regularly to clear stray flour dust and condensation.
Establish a firm operational rhythm for the display:
  1. Conduct an exterior sidewalk inspection each morning before opening doors, assessing the window from the perspective of an approaching pedestrian walking in both directions.
  2. Clean all glass surfaces and wipe down display risers to remove loose crumbs, stray sesame seeds, or flaky pastry shards that shed onto display trays.
  3. Refresh the staging midway through the afternoon, removing partially depleted platters that signal picked-over remnants rather than abundant freshness.
When maintained with discipline, an eye-catching bakery window does more than decorate a building facade. It tells a silent story of craftsmanship, culinary discipline, and uncompromising freshness, effortlessly turning the sidewalk into your bakery’s front porch.
read more
Bakery & Cake

Master the Crumb: Gluten-Free Bakery Swaps That Never Compromise on Texture

Every baker who has ever ventured into gluten-free pastry knows the quiet disappointment of a failed bake. The exterior may boast an enviable golden sheen, but beneath the surface lies a heartbreaking flaw: a dry, sandy crumb that dissolves into dust, a dense gummy core that never seems fully set, or a pastry that goes stale three hours out of the oven.
For decades, gluten-free baking carried a reputation of reluctant compromise. Commercial all-purpose blends promised seamless cup-for-cup swaps, yet they routinely yielded cookies that spread into paper-thin puddles and bread loaves with the density of damp bricks. The issue does not stem from a lack of quality ingredients, but from a fundamental misunderstanding of what wheat flour actually accomplishes inside an oven.
Wheat flour is not a passive carrier of flavor; it is an active structural matrix. When hydrated and agitated, its primary storage proteins, glutenin and gliadin, link together to form an elastic, extensible network known as gluten. This microscopic web traps expanding steam and carbon dioxide, allowing dough to rise, expand, and hold its shape while setting into an airy, resilient crumb.
Replicating that dynamic without wheat requires an architectural approach. Rather than relying on a single miracle ingredient, professional bakers construct a balanced ecosystem of distinct whole grains, refined starches, binders, and moisture regulators tailored to the specific bake at hand.

Deconstructing the Blend: The Flaw in Universal Mixes

Commercial one-to-one gluten-free blends are formulated for convenience, usually designed around a generic midpoint between a drop biscuit and a layer cake. Most of these mixes rely heavily on a combination of white rice flour, brown rice flour, potato starch, and tapioca flour, cut with a standard dose of xanthan gum.
While this balance works acceptably well for quick breads or banana muffins where fruit purees provide natural emulsification and heft, it falls apart when applied to artisan baguettes, laminated pastries, or delicate shortbreads. Rice flour alone is naturally gritty due to the hard, crystalline structure of its starch granules. Without sufficient starch buffering or precise grain sizing, that grit persists even through high-heat baking.
Achieving pastry-case quality demands custom flour ratios. A reliable standard for bakery formulation balances 70 percent structural grains against 30 percent functional starches for dense, hearty items, and inverts that ratio toward 40 percent grains and 60 percent starches for delicate, high-lift items like sponge cakes and choux pastry.

Selecting the Structural Foundation

The whole-grain component supplies protein, ash content, and flavor. Sorghum flour delivers an earthy, mild sweetness with a protein profile that closely mirrors soft wheat, making it an exceptional base for butter cakes and scones. Millet flour brings a delicate yellow crumb and tender bite, ideal for sugar cookies and yellow cakes, though it must be balanced carefully to avoid bitterness. Fine-milled oat flour, processed from certified gluten-free oats, is unmatched in its ability to produce a soft, pillowy chew in chocolate chip cookies and breakfast pastries thanks to its high beta-glucan content.

Calibrating Functional Starches

Starches dictate tenderness, gelatinization, and crispness. Tapioca starch, derived from cassava root, provides chew, elasticity, and golden browning, making it indispensable for yeast breads and chewy cookies. Potato starch absorbs massive amounts of ambient moisture at lower temperatures, producing a delicate, melt-in-your-mouth crumb in pound cakes and pie crusts. Arrowroot powder acts as a cleaner, neutral alternative to cornstarch, producing a silky texture without adding a chalky aftertaste.

The Superfine Milling Advantage

Grain type means very little if the particle size is wrong. Standard grocery-store rice flours are milled through coarse screens that leave sharp, jagged granules behind. When baked, these granules fail to hydrate completely, producing the dreaded sandbox mouthfeel. Sourcing flours milled to a superfine micron rating changes everything. A superfine white rice flour absorbs liquid evenly, swelling during the resting phase and baking into a seamless, velvety crumb that defies detection.

Engineering Elasticity: Beyond Xanthan Gum

When you eliminate gluten, you remove the rubber band that keeps dough from tearing apart under the force of thermal expansion. Most home recipes immediately turn to xanthan gum as the default fix. While xanthan gum is a powerful hydrocolloid that creates viscosity, an accidental heavy hand turns dough slimy and imparts an unappealing, rubbery bounce to baked goods.
Elevating the texture requires deploying the right binder for the specific structural challenge.

Whole Psyllium Husk for Artisan Breads

For yeasted bread, focaccia, and pizza dough, whole psyllium husk is the undisputed gold standard. Derived from the seeds of the Plantago ovata plant, psyllium is pure soluble fiber. When whisked with warm water, it forms an elastic, pliable gel that mirrors the physical properties of a hydrated gluten network better than any commercial gum.
Doughs formulated with psyllium can be shaped, braided, scored, and handled by hand. During baking, the psyllium gel traps expanding gas bubbles securely, resulting in an open, irregular crumb structure with an authentic, crusty exterior and a distinct sourdough-like chew. For ideal dispersion, grind whole husks into a coarse powder rather than using ultra-fine commercial preparations, which can tint the crumb an unappetizing pale purple.

Chia and Flax Gels for Soft Cakes

In tender crumb applications like carrot cakes, brownies, and dense loaf cakes, ground golden flaxseed or finely milled chia seed gels offer functional binding alongside natural fat. Whisked with boiling water at a one-to-three ratio and allowed to cool, these seed gels provide structural stability without the gummy resilience associated with synthetic stabilizers. They also contain mucilage that locks in hydration, preventing the rapid staling that plagues so many gluten-free products.

The Hydration Equation and the Pre-Gelatinization Hack

Gluten-free grains lack the immediate surface absorption properties of wheat flour, yet their total water-holding capacity over time is substantially higher. A standard wheat dough might operate comfortably at 65 percent hydration, but an equivalent gluten-free formula often requires 75 to 85 percent hydration to fully saturate the starches.
If a gluten-free batter appears thick and workable right out of the mixer, it is almost certainly too dry. The unbaked batter should look visibly looser and more fluid than its traditional counterpart.

The Tangzhong Technique

Borrowed from traditional Asian milk bread baking, the tangzhong, or water roux, method is one of the most effective tools for solving dryness in gluten-free baking. By cooking a small fraction of the formula’s starch—typically sweet rice flour or tapioca starch—with a portion of the recipe’s liquid to approximately 150 degrees Fahrenheit, the baker forces the starch molecules to swell and gelatinize ahead of time.
Incorporating this gelatinized paste into the final dough matrix achieves three major victories:
  • It locks moisture securely into the crumb, drastically reducing moisture loss during baking.
  • It increases oven spring by creating an extensible network that stretches easily as gases heat up.
  • It extends bakery shelf life naturally, keeping sandwich breads and dinner rolls tender for three to four days without artificial preservatives.

Strategic Fat and Sugar Swaps for Crumb Architecture

Texture is not solely a product of flour and binders; fat crystallization and sugar hygroscopy play decisive roles in how a crumb shatters, bends, or melts.

Almond Flour as a Fat Emulsifier

Blending finely blanched almond flour into your flour mix is an exceptional strategy for cookies, tart shells, and quick breads. Almond flour brings healthy fats, natural moisture, and distinct structural protein that disrupts grain starches just enough to create a tender, short crumb. In pie crusts, replacing 15 percent of the total flour blend with almond flour prevents the crust from shrinking on the pan while delivering a rich, buttery flakiness that shatters cleanly against a fork.

Invert Sugars for Moisture Retention

Granulated sucrose creates a crisp, light structure, but it releases moisture quickly once the pastry cools. To combat premature drying, professional bakers swap a portion of white sugar for invert sugars like real honey, dark maple syrup, or light brown sugar. Invert sugars are naturally hygroscopic, meaning they pull ambient humidity from the surrounding atmosphere directly into the baked crumb, preserving that coveted fudge-like center in cookies and brownies long after they leave the cooling rack.

Category-Specific Swaps for Everyday Classics

Applying these principles requires dialing in the right balance for each distinct baking category.

Flaky Pastries and Pie Crusts

The objective here is crisp separation without crumbly disintegration. Use a base of superfine white rice flour and sweet rice flour paired with cold, grated butter and a splash of apple cider vinegar. Sweet rice flour, despite its name, contains no gluten; it is milled from sticky, short-grain glutinous rice that is rich in amylopectin starch. This starch adds unique cohesion, allowing the baker to roll the dough thin without it tearing, creating delicate, wafer-thin layers that puff under intense oven heat.

Chewy Bakery Cookies

To prevent cookies from spreading into thin lace or turning into cakey disks, lean on a foundation of certified gluten-free oat flour and tapioca starch, supplemented by a single extra egg yolk. The extra yolk supplies lecithin, which acts as a natural emulsifier, binding the high fat content to the liquid. Chill the portioned dough balls for at least twelve hours before baking to allow the oat starches to fully hydrate and the fats to solidify completely.

Artisan Loaves and Dinner Rolls

Skip commercial blends entirely. Build a base around equal parts sorghum flour and millet flour, bulked with tapioca starch for lift and anchored by a generous hydration of five percent whole psyllium husk. Incorporate a light splash of carbonated water into the mix; the effervescence aids mechanical leavening, helping the heavy, dense grains lift off the pan before the yeast fully takes over.

The Resting Protocol: Time as an Essential Ingredient

The final swap costs nothing, yet it is skipped more frequently than any other technique: exchanging immediate convenience for time.
Wheat batters can often be mixed and transferred directly to the oven because gluten hydrates rapidly under mechanical friction. Gluten-free starches, conversely, require extended quiet time to absorb ambient liquids.
Allowing cookie doughs, muffin batters, and cake mixes to rest in the bowl for 30 to 45 minutes before baking gives the dense starch granules time to soften completely. This simple pause smooths out gritty particles, thickens loose batters into scoopable doughs, and promotes even Maillard browning across the crust.
Once baked, patience remains paramount. As gluten-free items emerge from the oven, their interior starches are still undergoing retrogradation, the process where amylose and amylopectin chains realign and set into their final structural crystalline form. Cutting into a warm gluten-free loaf of bread releases trapped steam prematurely, instantly collapsing the delicate interior cell walls and leaving behind a gummy, dense stripe.
Allowing bread and delicate pastries to cool completely to room temperature on an elevated wire rack lets the moisture stabilize throughout the crumb, ensuring that every slice yields clean, airy perfection.
By understanding the physics of hydration and the specific mechanical roles of diverse grains, you remove guesswork from the kitchen. Gluten-free baking stops being an exercise in limitation and becomes an art of deliberate precision, delivering bakery-worthy textures that stand proudly alongside any traditional creation.
read more
Bakery & Cake

Beyond the Compromise: How Plant-Based Pastry Conquered the Neighborhood Bakery

Walk into an independent neighborhood bakery early on a Tuesday morning, and the sensory cues remain reassuringly familiar. The air carries the bittersweet perfume of roasted coffee beans, the ambient warmth of deck ovens radiating across the floor, and the unmistakable aroma of caramelized sugar and toasted flour. In the display case, trays of pain au chocolat glisten under soft track lighting, their mahogany crusts fractured into paper-thin ridges. Next to them sit Meyer lemon tarts with mirror-smooth curds, cardamom buns woven into tight braids, and dark chocolate cookies pooled with molten centers.
A decade ago, you could reliably spot the plant-based options in this case without checking the labels. They were the dense, bran-heavy muffins lurking in the corner, dusted with turbinado sugar in a polite attempt to distract from their lack of moisture, or the crumbly shortbread that tasted faintly of nutritional yeast and raw coconut oil.
Today, that visual and tactile boundary has completely collapsed. The laminated croissant with the honeycomb interior and the shatteringly crisp exterior might contain zero grams of cow’s butter. The silky pastry cream filling the fruit tart was whisked without a single egg yolk. More telling still, the customer ordering that pastry often neither knows nor cares that it is vegan. They buy it because it happens to be the best pastry in the shop.
The arrival of plant-based baking in mainstream neighborhood bakeries represents something far more significant than a passing dietary fad. It marks a fundamental shift in how artisans understand food science, how small businesses manage community demand, and how modern eaters define indulgence.

Rethinking the Architecture of Pastry

Traditional French and European patisserie was never designed to be flexible. It was codified over centuries around a sacred trinity: butter, eggs, and refined wheat flour. In classic baking, dairy butter is not merely an ingredient; it is a structural engineer. Butterfat provides flavor, while water trapped in the fat creates steam during baking, pushing delicate layers of dough apart to yield puff and flake. Eggs serve as the kitchen’s ultimate multitaskers, acting simultaneously as emulsifiers, leaveners, moisture retainers, and structural scaffolding through coagulating proteins.
For years, early commercial attempts to replicate these dynamics without animal products relied on clumsy substitutions. Bakers swapped butter for generic vegetable shortening and replaced eggs with applesauce or mashed bananas. The results were predictably heavy, sticky, and laden with unwanted residual flavors. Shortening melted at a different temperature than butter, leaving an unpleasant waxy film on the roof of the mouth, while fruit purees produced dense cakes that fought against delicate spices.
The modern transformation began when pastry chefs stopped looking for one-to-one drop-in substitutes and started breaking baking down into its molecular components.
Instead of treating dairy butter as an indivisible monolith, contemporary bakers analyze its physical parameters: melting point, plasticity, moisture ratio, and solid-fat content. Today’s artisan bakeries work with tailored fat profiles. Blends of cold-pressed shea, deodorized coconut oil, and high-oleic sunflower oils are churned with fermented oat or cashew milk cultures to mimic the lactic acidity and exact crystalline structure of high-fat European butter. When folded into laminated doughs, these engineered plant fats behave with the same pliability on the sheeter, melting cleanly on the tongue at human body temperature rather than coating the palate.

The Chemistry of Lift and Emulsion

Replacing the structural and emulsifying power of the whole egg proved equally demanding, leading bakers to adopt functional ingredients once confined to modernist dining rooms.

The Rise of Plant Proteins

Aquafaba—the viscous liquid left over from cooking chickpeas—entered the baking vernacular nearly a decade ago, but its application has evolved from a home-kitchen parlor trick into a refined technical tool. Rich in saponins and dissolved proteins, it can be whipped into stable meringues that hold crisp peaks through low-temperature baking. When paired with modified potato starch or isolated faba bean protein, it forms a cohesive gel matrix that holds cakes together without masking the nuanced notes of Madagascar vanilla or fresh stone fruit.

Precision Moisture and Emulsification

The challenge of rich custards and ganaches lay in fat dispersal. Egg yolks contain lecithin, an organic emulsifier that binds water to fat. Modern pastry chefs achieve the same gloss and velvet mouthfeel by balancing sunflower lecithin with citrus fibers and pectin. A passionfruit curd made with oat cream, cocoa butter, and high-methoxyl pectin sets with clean edges on a pastry ring while melting instantly upon contact with the palate.
By mastering these chemical interactions, bakeries have removed the lingering stigma of sacrifice. The pastry is no longer an imitation; it is an accomplishment of culinary mechanics in its own right.

Who Is Actually Buying the Vegan Scone?

The commercial viability of plant-based treats in small-scale bakeries cannot be credited to strict vegans alone. Dedicated plant-based eaters remain a relatively small, albeit loyal, percentage of the general population. The explosive sales driving these items come from a much broader and more pragmatic demographic: flexitarians, lactose-intolerant adults, families navigating severe food allergies, and curiosity-driven food lovers.
Lactose intolerance affects an estimated 65 percent of the global adult population, including a significant portion of urban American consumers. For decades, ordering a morning pastry alongside a plant-milk latte meant accepting a digestive gamble. The availability of high-end dairy-free croissants and brioche has allowed millions of people to re-enter the traditional bakery experience without consequence.
Simultaneously, severe egg and dairy allergies among young children have turned family bakery visits into minefields. When a local shop standardizes high-quality vegan options, it becomes a safe destination for entire families. If three children visit a bakery and one has an egg allergy, the parents will direct the entire transaction to the shop that can safely feed everyone without making anyone feel singled out.
Then there is the sensory seeker. In competitive urban and suburban food scenes, pastry enthusiasts track bakeries through word-of-mouth and social feeds, hunting down exceptional laminated textures and innovative seasonal fillings. If a plant-based matcha kouign-amann delivers extraordinary crunch and buttery depth, it earns a cult following purely on its culinary merits. The dietary label becomes an afterthought, an interesting detail rather than a defining warning label.

Kitchen Logistics and Small-Batch Economics

For independent bakery owners operating on tight margins and restricted square footage, incorporating plant-based items requires tactical planning. A bakery kitchen is rarely spacious; prep tables are crowded, oven space is at a premium, and storage walk-ins are packed to the ceiling.
Bakers generally navigate this reality in one of two ways. Some operate dual production lines, designating separate mixers, proofing bins, and rolling pins to prevent cross-contact for allergy-conscious guests. Others, realizing the quality parity achievable with modern techniques, make a bolder choice: they convert standard menu items entirely to plant-based formulations without advertising it aggressively.
When a chocolate chip cookie, a fruit scone, or a seasonal focaccia can be made plant-based without sacrificing flavor or crumb structure, running a single formulation saves labor, prevents ingredient spoilage, and streamlines inventory. The baker purchases fewer dairy components, reduces the administrative load of tracking separate batches, and expands the potential audience for that specific item to 100 percent of the foot traffic walking through the front door.
Ingredient costs do present a hurdle. High-performance plant butters and isolated plant proteins currently command a premium over conventional wholesale dairy butter and commodity eggs. However, the extreme volatility of egg and dairy prices over recent years has changed that calculus. For small operators, the price stability of specialty plant-based ingredients offers predictability, offsetting what used to be a significant cost gap. Furthermore, consumers have proven willing to pay fair, artisanal prices for baked goods that meet their dietary needs without compromising on execution.

The Bakery as an Inclusive Community Anchor

The neighborhood bakery has always functioned as a neighborhood anchor—a “third place” outside the home and the workplace where brief, grounding human interactions occur every morning. When a bakery evolves to reflect the changing values and physical realities of its community, that social bond deepens.
Historically, restrictive diets have carried a subtle social friction. Eating with friends or colleagues often meant negotiating compromises or sitting empty-handed while others enjoyed a shared table. By making exceptional plant-based options a natural fixture of the daily lineup rather than an isolated, cellophane-wrapped concession, modern bakeries cultivate genuine hospitality. Hospitality, at its core, is the art of making everyone feel anticipated and welcome.
When an artisan baker treats plant-based pastry with the exact same rigor, respect, and craftsmanship applied to classical sourdough or traditional brioche, it sends a clear message to the neighborhood: dietary preferences and physical restrictions do not exclude you from pleasure, tradition, or craft.
The quiet triumph of plant-based pastry in the neighborhood case is not that it replaced tradition, but that it expanded it. The modern display case proves that indulgence does not belong to a single set of agricultural products. It belongs to technique, imagination, and the simple human joy of tearing into a fresh, warm, perfectly crafted pastry.
read more
Restaurant

Stemming the Financial Bleed: Restaurant Inventory Strategies That Stop Over-Ordering

Step into the walk-in cooler of an underperforming restaurant on a Sunday night, and you will rarely see bare shelves. What you will find instead is a quiet graveyard of working capital: cases of heirloom tomatoes developing soft spots, half-empty cambros of house-made emulsions oxidizing in the back corner, and vacuum-sealed beef tenderloins pushed past their prime.
Every case of spoiled produce and every moldering block of cheese represents real cash that was pulled from the restaurant’s operational bank account and abandoned on a cold wire shelf.
Over-ordering is one of the most pervasive operational failures in commercial food service. Unlike overt theft or broken equipment, which register as immediate shocks, excessive purchasing is an insidious leak that slowly drains a restaurant’s profit margins. Kitchen managers often view an overstuffed walk-in as a reassuring safety net against the dreaded scenario of eighty-sixing a signature dish. In reality, an overstocked kitchen breeds carelessness, inflates holding costs, drives up waste, and obscures the true cost of goods sold.
Taming this operational drag requires treating food inventory for what it truly is: perishable cash. By replacing emotional guesswork with disciplined inventory architecture, dynamic forecasting, and tight kitchen controls, operators can curb over-ordering without compromising dining room execution.

The Psychological Drivers Behind Excess Inventory

To fix an ordering problem, operators must first understand why chefs and kitchen managers buy too much food in the first place. Over-ordering is rarely an accident of simple math; it is almost always an emotional reaction to operational anxiety or flawed commercial incentives.

The Fear of Running Out

The foremost driver is the visceral terror of the eighty-six board. Every chef has endured the embarrassment of telling a dining room full of paying guests that the kitchen has run out of prime rib or fresh halibut halfway through Saturday service.
To avoid the wrath of front-of-house staff and dissatisfied patrons, managers build subjective cushions into every order. They order an extra case of heavy cream, three extra flats of berries, and an additional box of strip loins “just in case.” When that emotional cushion is added across dozens of line items every week, the kitchen routinely carries thousands of dollars in surplus stock that it cannot possibly sell before degradation sets in.

The Bulk Discount Illusion

Broadline food distributors are skilled at selling the illusion of savings. Sales representatives routinely dangle case-break penalties or tiered volume discounts in front of purchasing managers: buy ten cases of butter for a five percent discount per pound, or take an entire pallet of fry oil to knock two dollars off each box.
Unless your operation processes massive, predictable volume, those perceived savings evaporate the moment storage realities take over. Food that sits in dry storage ties up liquidity that could cover payroll or maintenance. More critically, when line cooks see an endless supply of an ingredient, portion control slips, trimming standards relax, and waste increases. A bulk discount is an expensive liability if a fraction of the product ends up in the compost bin.

Modernizing Par Levels: From Static Sheets to Dynamic Forecasting

The foundational tool of restaurant ordering has long been the par level: a predetermined quantity of an ingredient that must be on hand to meet expected demand until the next delivery arrives. However, the way most restaurants calculate and manage their pars is fundamentally broken.
In traditional kitchens, par levels are static figures scrawled on a laminated clipboard or an outdated spreadsheet. A manager might establish a par of six cases of chicken breast in June and continue using that exact number through a freezing, slow week in January. Demand in a restaurant is dynamic, fluctuating based on payroll cycles, local events, weather conditions, holidays, and seasonal shifts in appetite.

Building Dynamic Safety Stocks

A modern par system must be responsive. Instead of a single, immutable number, establish dynamic pars adjusted by day of the week and historical sales velocity.
Your ordering formula should look past intuition and track a specific mathematical structure:
  • Determine your average daily usage for an ingredient based on recent point-of-sale sales data.
  • Multiply that daily usage by the lead time between distributor deliveries.
  • Add a calculated safety stock—typically ten to fifteen percent, depending on vendor reliability—rather than an arbitrary extra case.
If your kitchen goes through two cases of romaine lettuce on Mondays and Tuesdays combined, but tears through eight cases between Thursday night and Saturday afternoon, your prep team should maintain separate early-week and weekend par targets. Operating with tiered pars forces ordering managers to match inventory intake directly to immediate consumption cycles.

Aligning Lead Times with Purveyor Drops

Another common flaw in ordering protocols is ignoring the difference in vendor lead times. Ingredients sourced from a local farm or a specialty butcher might require a four-day advance order, while a broadline distributor can drop cases next morning if the order is placed by 9:00 PM.
Categorize your inventory sheets by lead-time windows. High-lead-time items require rigorous advance forecasting, while short-lead-time staples should be ordered at the latest possible cutoff point. Tightening that ordering window reduces the length of time food sits in your storage areas, improving ingredient freshness and lowering your exposure to spoilage.

The Sheet-to-Shelf Discipline: Organizing Physical Real Estate

Inventory control is impossible in a disorganized environment. If a manager cannot count the entire stock of a walk-in cooler or dry storage area in under twenty minutes, the count will inevitably be inaccurate, leading directly to duplicate ordering.
The most effective physical intervention is the sheet-to-shelf storage method.
The digital or physical count sheet must mirror the exact geographic layout of your shelving units, moving from left to right, top to bottom. The first item listed on your walk-in count sheet should be the first item sitting on the top-left shelf as you open the cooler door. When the inventory sheet matches the physical space:
  • The person taking inventory never has to double back, skip shelves, or hunt for hidden cases.
  • Inconsistencies jump out immediately; an empty shelf space signals low stock without requiring a search through mismatched stacks of boxes.
  • The time required to execute a complete, accurate count drops significantly, removing the friction that leads cooks to estimate counts rather than actually touching the boxes.

Establishing Hard Storage Limits

Physical space should dictate purchasing boundaries. Use colorful vinyl floor tape or shelf markers to establish dedicated footprints for every single raw ingredient.
If your kitchen assigns space for exactly two cases of frying oil on a metro rack, the ordering manager is physically barred from ordering a third until the existing boxes are moved to the fryer line. Restricting physical capacity prevents storage areas from becoming dumping grounds for overzealous purchases and protects sightlines across the kitchen.

Bridging the Variance Gap: Theoretical vs. Actual Food Cost

Restaurants that struggle with chronic over-ordering often track food costs purely on a retroactive, cash-accounting basis. At the end of the month, the bookkeeper tallies up supplier invoices, looks at gross food sales, and delivers a broad food cost percentage.
While this metric reveals overall financial health, it is far too delayed and blunt to prevent over-purchasing. It tells you that you spent too much money, but it cannot pinpoint where or why the excess occurred.
Controlling inventory requires measuring the variance between theoretical food cost and actual food cost.

Calculating the Equation

Theoretical food cost represents what the kitchen should have spent based on point-of-sale data and precise recipe builds. If your point-of-sale system records that you sold one hundred portions of cedar-plank salmon over the weekend, and each portion is engineered to contain precisely seven ounces of fish, your theoretical usage is 43.75 pounds of salmon.
Actual food cost represents what was physically consumed from your inventory over that same period:
  • Beginning inventory value plus received invoices, minus ending inventory value.
When you subtract your theoretical usage from your actual usage, the difference is your variance. An acceptable operational variance typically hovers between one and two percent, accounting for natural trim loss, minor line splatters, and minimal shrinkage.
If your variance on salmon jumps to eight percent, you have an immediate operational diagnostic. The kitchen is either over-portioning on the line, suffering from unrecorded prep waste during butchery, dealing with internal theft, or over-ordering to compensate for product spoiling before it can be portioned. Tracking this variance weekly instead of monthly isolates leaks immediately, allowing leadership to correct prep procedures before another unneeded case is ordered.

Menu Engineering and Ingredient Cross-Utilization

Over-ordering is often baked into the menu design itself. When an executive chef creates a menu featuring single-use specialty ingredients, the purchasing manager is backed into an operational corner.
Consider a dish that features fresh micro-sorrel or an uncommon imported cheese. If that specific appetizer experiences an unexpected slump in sales over a rainy Tuesday and Wednesday, those delicate greens will turn into compost before the weekend rush arrives. Yet the kitchen must keep ordering them to ensure the dish remains available.

The Rule of Three

Combat this liability by instituting a strict culinary policy: every raw ingredient brought through the back door must be integrated into at least three distinct menu items.
A single protein cut should yield a primary dinner entrée, an element in a lunch sandwich, and a component for a seasonal soup or braised appetizer. Fresh herbs should cross over between protein sauces, salad dressings, and bar garnishes.
Cross-utilization creates high operational velocity. Because an ingredient moves through multiple stations simultaneously, cases turn over rapidly, minimizing the risk of localized spoilage. If one particular menu item underperforms, the kitchen still burns through the raw stock across its companion dishes, preventing inventory stagnation and eliminating the need for reactive over-ordering.

Purveyor Dynamics: Negotiating Delivery Cadence Over Order Size

Many operators accept distributor delivery schedules as fixed parameters. If the broadline supplier only drops trucks on Tuesdays and Fridays, the restaurant assumes it must order massive batches to bridge the gap.
In competitive distribution markets, operators hold more leverage than they realize. If your volume warrants it, negotiate for a third delivery window. Splitting a massive weekly order into three smaller, manageable drops drastically reduces the volume of food sitting idle on your shelves at any given moment.
Furthermore, partner with localized purveyors for highly perishable categories like dairy, seafood, and tender greens. While broadline vendors excel at non-perishable dry goods, paper products, and frozen items, their minimum order sizes often force smaller operators to buy full cases of produce when they only need a few pounds.
Paying a slight premium per pound to a local produce purveyor who delivers four days a week with zero case-break penalties is almost always cheaper than buying a whole, discounted case from a national distributor and throwing forty percent of it away.

Depolarizing the Waste Log: Culture Drives Compliance

Technology and spreadsheets are entirely useless if the people working the stations hide their mistakes. In many kitchens, when a cook drops a prime ribeye on the floor or scorches a batch of demi-glace, their immediate instinct is to hide the evidence in the bottom of the trash can to avoid public embarrassment or a reprimand from the chef.
When kitchen mistakes are hidden, the inventory system loses integrity. The inventory sheet shows that five pounds of butter are missing, but no one knows where they went. The ordering manager assumes the kitchen simply used more butter than expected, and promptly orders an extra case on the next delivery.
To stop this cycle, leadership must depolarize the waste sheet. A clear, transparent waste log must be treated as an essential operational sensor, not an instrument of punishment.
Train the line staff to record every single ounce of discarded food:
  • Distinguish between pre-consumer waste (butchery trim, vegetable peels, expired raw product) and post-consumer waste (food sent back by guests, unserved line drops).
  • Require team members to write down the item, the exact weight or count, the time of day, and the operational reason for the loss.
  • Review the waste log publicly at every pre-shift meeting without hostility.
When kitchen crews realize that logging a ruined batch of sauce helps management order more accurately—reducing the chaos and clutter of their own prep stations—compliance transforms from a chore into a shared standard of professional pride.
Controlling restaurant inventory is not about depriving your kitchen of what it needs to execute exceptional hospitality. It is about removing the friction, chaos, and financial drag of excess stock. When you tighten pars, demand physical organization, cross-utilize your pantry, and base your purchasing on clean, empirical data, you run a calmer line, protect your bottom line, and ensure that every dollar entering the kitchen leaves as a sold plate rather than a line item on a disposal sheet.
read more
Food

Morning Neurochemistry: Whole Foods That Power Mental Focus and Clarity

The transition from sleep to waking productivity is often treated as an espresso-fueled emergency. Alarms ring, coffee pots gurgle, and many people grab whatever portable carbohydrate sits closest to the doorway. A blueberry muffin from the corner coffee shop, a bowl of refined breakfast flakes, or a hurried bagel with cream cheese might satisfy immediate hunger, but from a neurological standpoint, it sets a treacherous trap.
The human brain accounts for roughly two percent of total body weight while demanding over twenty percent of the body’s resting energy expenditure. It is a relentlessly active organ, operating an intricate network of electrical pulses, neurotransmitter synthesis, and cellular repair around the clock. During the night, while you sleep, your central nervous system conducts vital housekeeping, clearing metabolic debris and consolidating memories.
When morning arrives, your brain requires fresh biochemical substrate to synthesize neurotransmitters, protect neuronal membranes from oxidative stress, and maintain a steady supply of energy. Bombarding that delicate system with refined sugars and simple starches triggers a rapid insulin spike, followed shortly by a precipitous blood glucose crash. By mid-morning, the result is familiar: sluggish recall, scattered focus, and an irresistible urge to reach for a second or third cup of coffee.
Constructing a breakfast centered on specific, nutrient-dense whole foods changes this trajectory completely. By prioritizing structural fats, essential neurotransmitter precursors, vascular-supporting polyphenols, and slow-burning complex carbohydrates, you can prime your brain for sustained mental endurance throughout the day.

The Choline Powerhouse: Whole Pastured Eggs

For decades, dietary discourse unfairly villainized whole eggs, steering well-meaning eaters toward pale, watery egg-white omelets. In doing so, millions of people systematically discarded the most biologically valuable portion of the egg for cognitive performance: the yolk.
The yolk is an exceptional dietary source of choline, an essential micronutrient that serves as the direct building block for acetylcholine. Acetylcholine functions as one of the central nervous system’s primary neurotransmitters, regulating working memory, verbal recall, focus, and sustained attention. When dietary choline runs low, the brain struggles to maintain optimal signaling speed across synaptic junctions, manifesting as executive fatigue and mental fog.
Beyond choline, egg yolks are rich in phosphatidylcholine, a phospholipid that integrates directly into neuronal membranes, preserving their fluidity and structural integrity. Yolks also deliver concentrated amounts of lutein and zeaxanthin. While traditionally celebrated for macular health, these carotenoids accumulate selectively in neural tissue, where their antioxidant properties protect vulnerable fatty acids in the brain from oxidative degradation.
To maximize these benefits, keep the yolks gently cooked rather than scorched. Poaching, soft-boiling, or lightly frying eggs in olive oil protects the delicate fats and heat-sensitive nutrients from excessive oxidation, ensuring your brain receives their full biological value.

Structural Lipids: Omega-3s and Plant-Based Fats

Roughly sixty percent of the brain is composed of fat, with a substantial portion consisting of long-chain polyunsaturated fatty acids. These lipids are not passive energy stores; they form the physical architecture of neuron cell membranes and the myelin sheaths that insulate nerve fibers. The quality of fat you consume on a daily basis directly influences the speed, fluidity, and responsiveness of your cellular communication networks.

Wild Smoked Salmon and Cold-Water Fish

Adopting a savory, coastal approach to breakfast by incorporating cold-water fish provides an unparalleled neurological advantage. Wild salmon, smoked trout, and sardines deliver direct, pre-formed docosahexaenoic acid (DHA) and eicosapentaenoic acid (EPA).
DHA is the predominant structural omega-3 in the cerebral cortex. It embeds into cell membranes, modulating ion channels and supporting synaptic plasticity, which is the brain’s ability to adapt and form new connections. While the human body can technically convert plant-based alpha-linolenic acid (ALA) into DHA, that internal enzymatic conversion rate is notoriously inefficient. Incorporating a few ounces of cold-water fish onto morning sourdough or alongside eggs bypasses that metabolic bottleneck entirely, while providing a generous dose of vitamin B12 to support nerve conduction.

English Walnuts

For those who prefer a plant-forward morning plate, English walnuts stand distinct among tree nuts. Walnuts contain the highest concentration of plant-based omega-3 fatty acids of any common nut, alongside a unique profile of polyphenolic compounds known as ellagitannins.
When digested, these compounds yield neuroprotective metabolites that cross the blood-brain barrier, helping to dampen microglial activation and neuroinflammation. Furthermore, walnuts provide bioavailable magnesium, a mineral vital for regulating the NMDA receptor, which controls synaptic plasticity and long-term memory formation. A handful of raw or dry-roasted walnuts folded into warm cereal or blended into a morning spread delivers a satisfying crunch alongside robust cellular defense.

Enhancing Cerebral Perfusion: Anthocyanins and Flavanols

Cognitive clarity relies heavily on hemodynamics. Your brain requires a continuous, uninterrupted stream of oxygenated, nutrient-rich blood to perform complex computational tasks. Certain plant pigments possess the unique capability to enhance this vascular delivery system while shielding sensitive brain tissue from metabolic strain.

Wild Blueberries

Often referred to in culinary circles as the ultimate brain fruit, wild blueberries earn that title through their extraordinary concentration of anthocyanins, the water-soluble flavonoid pigments responsible for their deep indigo hue.
Wild blueberries differ significantly from their plump, cultivated supermarket cousins. Because they grow in harsher natural conditions, they develop a much higher skin-to-pulp ratio, concentrating their protective polyphenol content. Anthocyanins readily cross the blood-brain barrier, accumulating in regions like the hippocampus, which governs learning and memory retrieval. They work by stimulating the production of brain-derived neurotrophic factor (BDNF), a vital protein that encourages the survival and differentiation of neurons.
Adding half a cup of frozen wild blueberries to a morning smoothie or folding them into overnight oats delivers potent antioxidant support without triggering the aggressive glycemic spikes associated with high-sugar tropical fruits.

Raw Cacao and Dark Chocolate

Pure, unsweetened cacao nibs or high-percentage dark chocolate (eighty-five percent cacao or higher) represent one of the richest dietary sources of epicatechin, a plant flavanol that prompts the endothelial lining of blood vessels to release nitric oxide. Nitric oxide signals arterial walls to relax, widening blood vessels and significantly increasing cerebral blood flow.
Cacao also contains theobromine, a gentle, sustained stimulant structurally related to caffeine. Unlike caffeine, which causes rapid central nervous system stimulation and subsequent vasoconstriction, theobromine acts as a vasodilator. When paired with morning tea or coffee, cacao provides a smooth, sustained lift in alertness, mitigating the jittery edge often caused by isolated caffeine intake.

Stabilizing the Engine: Fermentation and Slow-Release Starches

The brain cannot store its own energy reserves. It relies on a steady, metered trickle of glucose delivered via the bloodstream. To prevent the cognitive roller coaster of rapid energy spikes and mid-morning slumps, breakfast must include foods that modulate glycemic absorption and nurture the gut-brain axis.

Whole-Milk Greek Yogurt and Kefir

The communication pathway between the digestive tract and the central nervous system—known as the gut-brain axis—is mediated in large part by the vagus nerve and bacterial metabolites. Consuming unflavored, fermented dairy like whole-milk Greek yogurt or kefir introduces live active cultures that promote a balanced gut microbiome.
These beneficial microbes ferment dietary fiber into short-chain fatty acids, which strengthen the intestinal barrier and signal the brain to regulate neuroinflammation. Furthermore, traditional Greek yogurt is strained, yielding roughly double the protein content of standard yogurt. This dense protein load slows gastric emptying, ensuring that carbohydrates enter the bloodstream at a controlled, predictable pace.

Steel-Cut Oats and Sprouted Whole Grains

When choosing morning carbohydrates, texture and processing dictate physiological impact. Highly processed instant oats break down in the stomach almost instantly, behaving much like refined table sugar. In contrast, steel-cut oats retain their intact fibrous hull, offering a dense matrix of beta-glucan soluble fiber.
Beta-glucan forms a viscous gel inside the digestive tract, delaying carbohydrate breakdown and flattening the post-meal glucose curve. This translates to hours of steady, uninterrupted fuel for the brain. Steel-cut oats also supply complex B vitamins, particularly thiamine and folate, which serve as essential coenzymes in energy production and the synthesis of dopamine and serotonin.

Building the Synergy: Simple Morning Combinations

The true power of neuro-nutrition lies in combination rather than isolation. Fat-soluble carotenoids like lutein require dietary fats to be absorbed efficiently, while polyphenol-rich fruits benefit from the stabilizing presence of proteins and fibers.
Consider moving away from single-ingredient meals in favor of intentional combinations:
  • The Savory Scramble: Two whole pastured eggs softly scrambled in extra-virgin olive oil, topped with sliced wild smoked salmon and folded into a sprouted grain wrap with baby spinach.
  • The Neuroprotective Porridge: Warm steel-cut oats prepared with water or unsweetened almond milk, topped with a half-cup of thawed wild blueberries, a tablespoon of raw cacao nibs, and a generous handful of crushed walnuts.
  • The Protein-Lipid Parfait: Thick, plain whole-milk Greek yogurt swirled with a tablespoon of chia seeds, ground flaxseed, a sprinkle of cinnamon, and fresh blackberries.
Upgrading your morning routine does not require complicated meal plans or exotic supplements. By intentionally filling your plate with real, whole foods that supply structural fats, steady energy, and protective antioxidants, you shift your morning meal from a thoughtless routine into an active investment in your focus, memory, and cognitive longevity.
read more
1 2 3 … 8
Page 1 of 8